Checklists in property management software tend to grow complicated in ways that do not serve the people using them. You start with a simple idea — "I need a turnover checklist for my cleaner" — and the software asks you to create a template, assign it to a group, configure a schedule, and link it to a trigger. Three concepts to learn, three places to manage, and three things that can fall out of sync.
ArrivHQ's unified checklist model reduces this to one concept. You create a checklist. It has sections, steps, trigger rules, and property assignments built in. There is nothing else to configure separately. One thing to create, one place to manage.
The old three-concept problem
Most checklist systems split functionality across separate objects. Templates define the steps. Groups or categories organize templates. Schedules or automations determine when instances get created. This architecture makes sense from an engineering perspective — it is normalized and flexible — but it creates real problems for the person using it.
The first problem is discoverability. Where do you go to change when a checklist runs? Is it on the schedule page, the template page, or the group page? The answer varies by system, and even experienced users forget.
The second problem is synchronization. When you update a template, do existing scheduled instances update too? Usually not. When you delete a group, do the templates inside it get deleted? Sometimes. These edge cases create silent failures that surface only when a cleaner shows up and the checklist is wrong.
The third problem is cognitive load. Every separate concept is something you need to understand, remember, and maintain. For a host with two properties and one cleaner, three concepts is overkill. For a host with ten properties and a team, three concepts means three times the surface area for mistakes.
The unified model: one checklist with sections
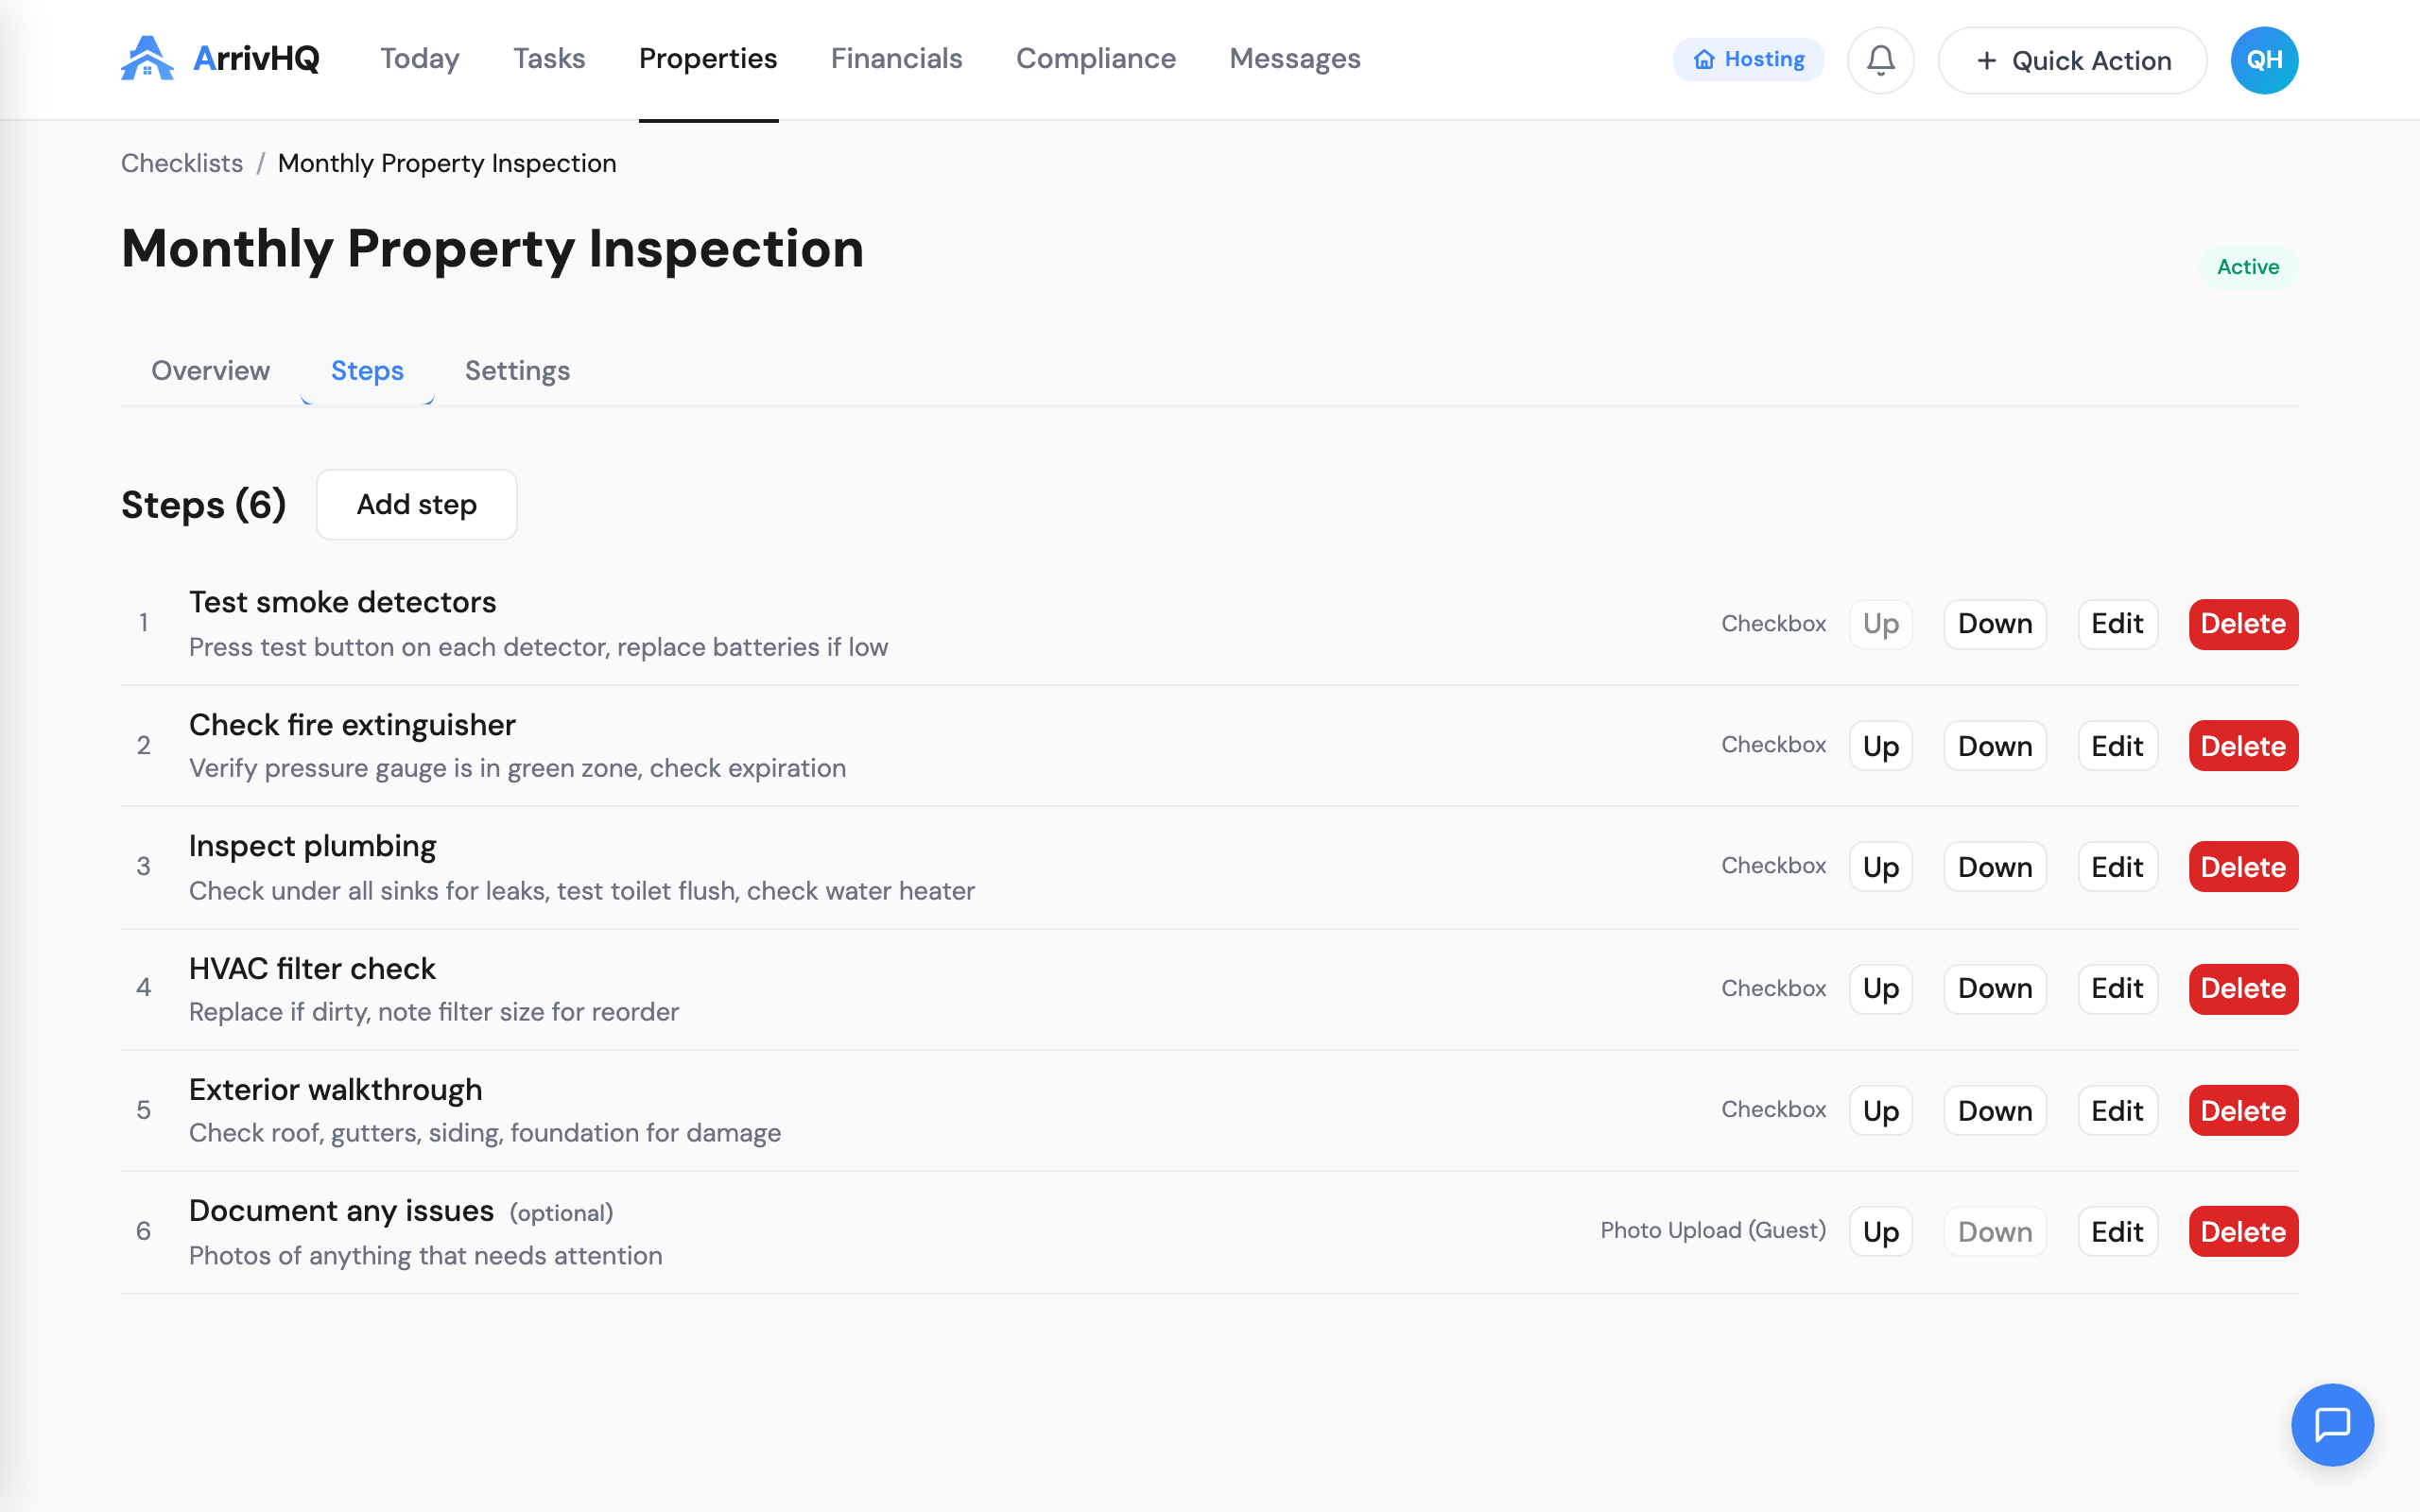
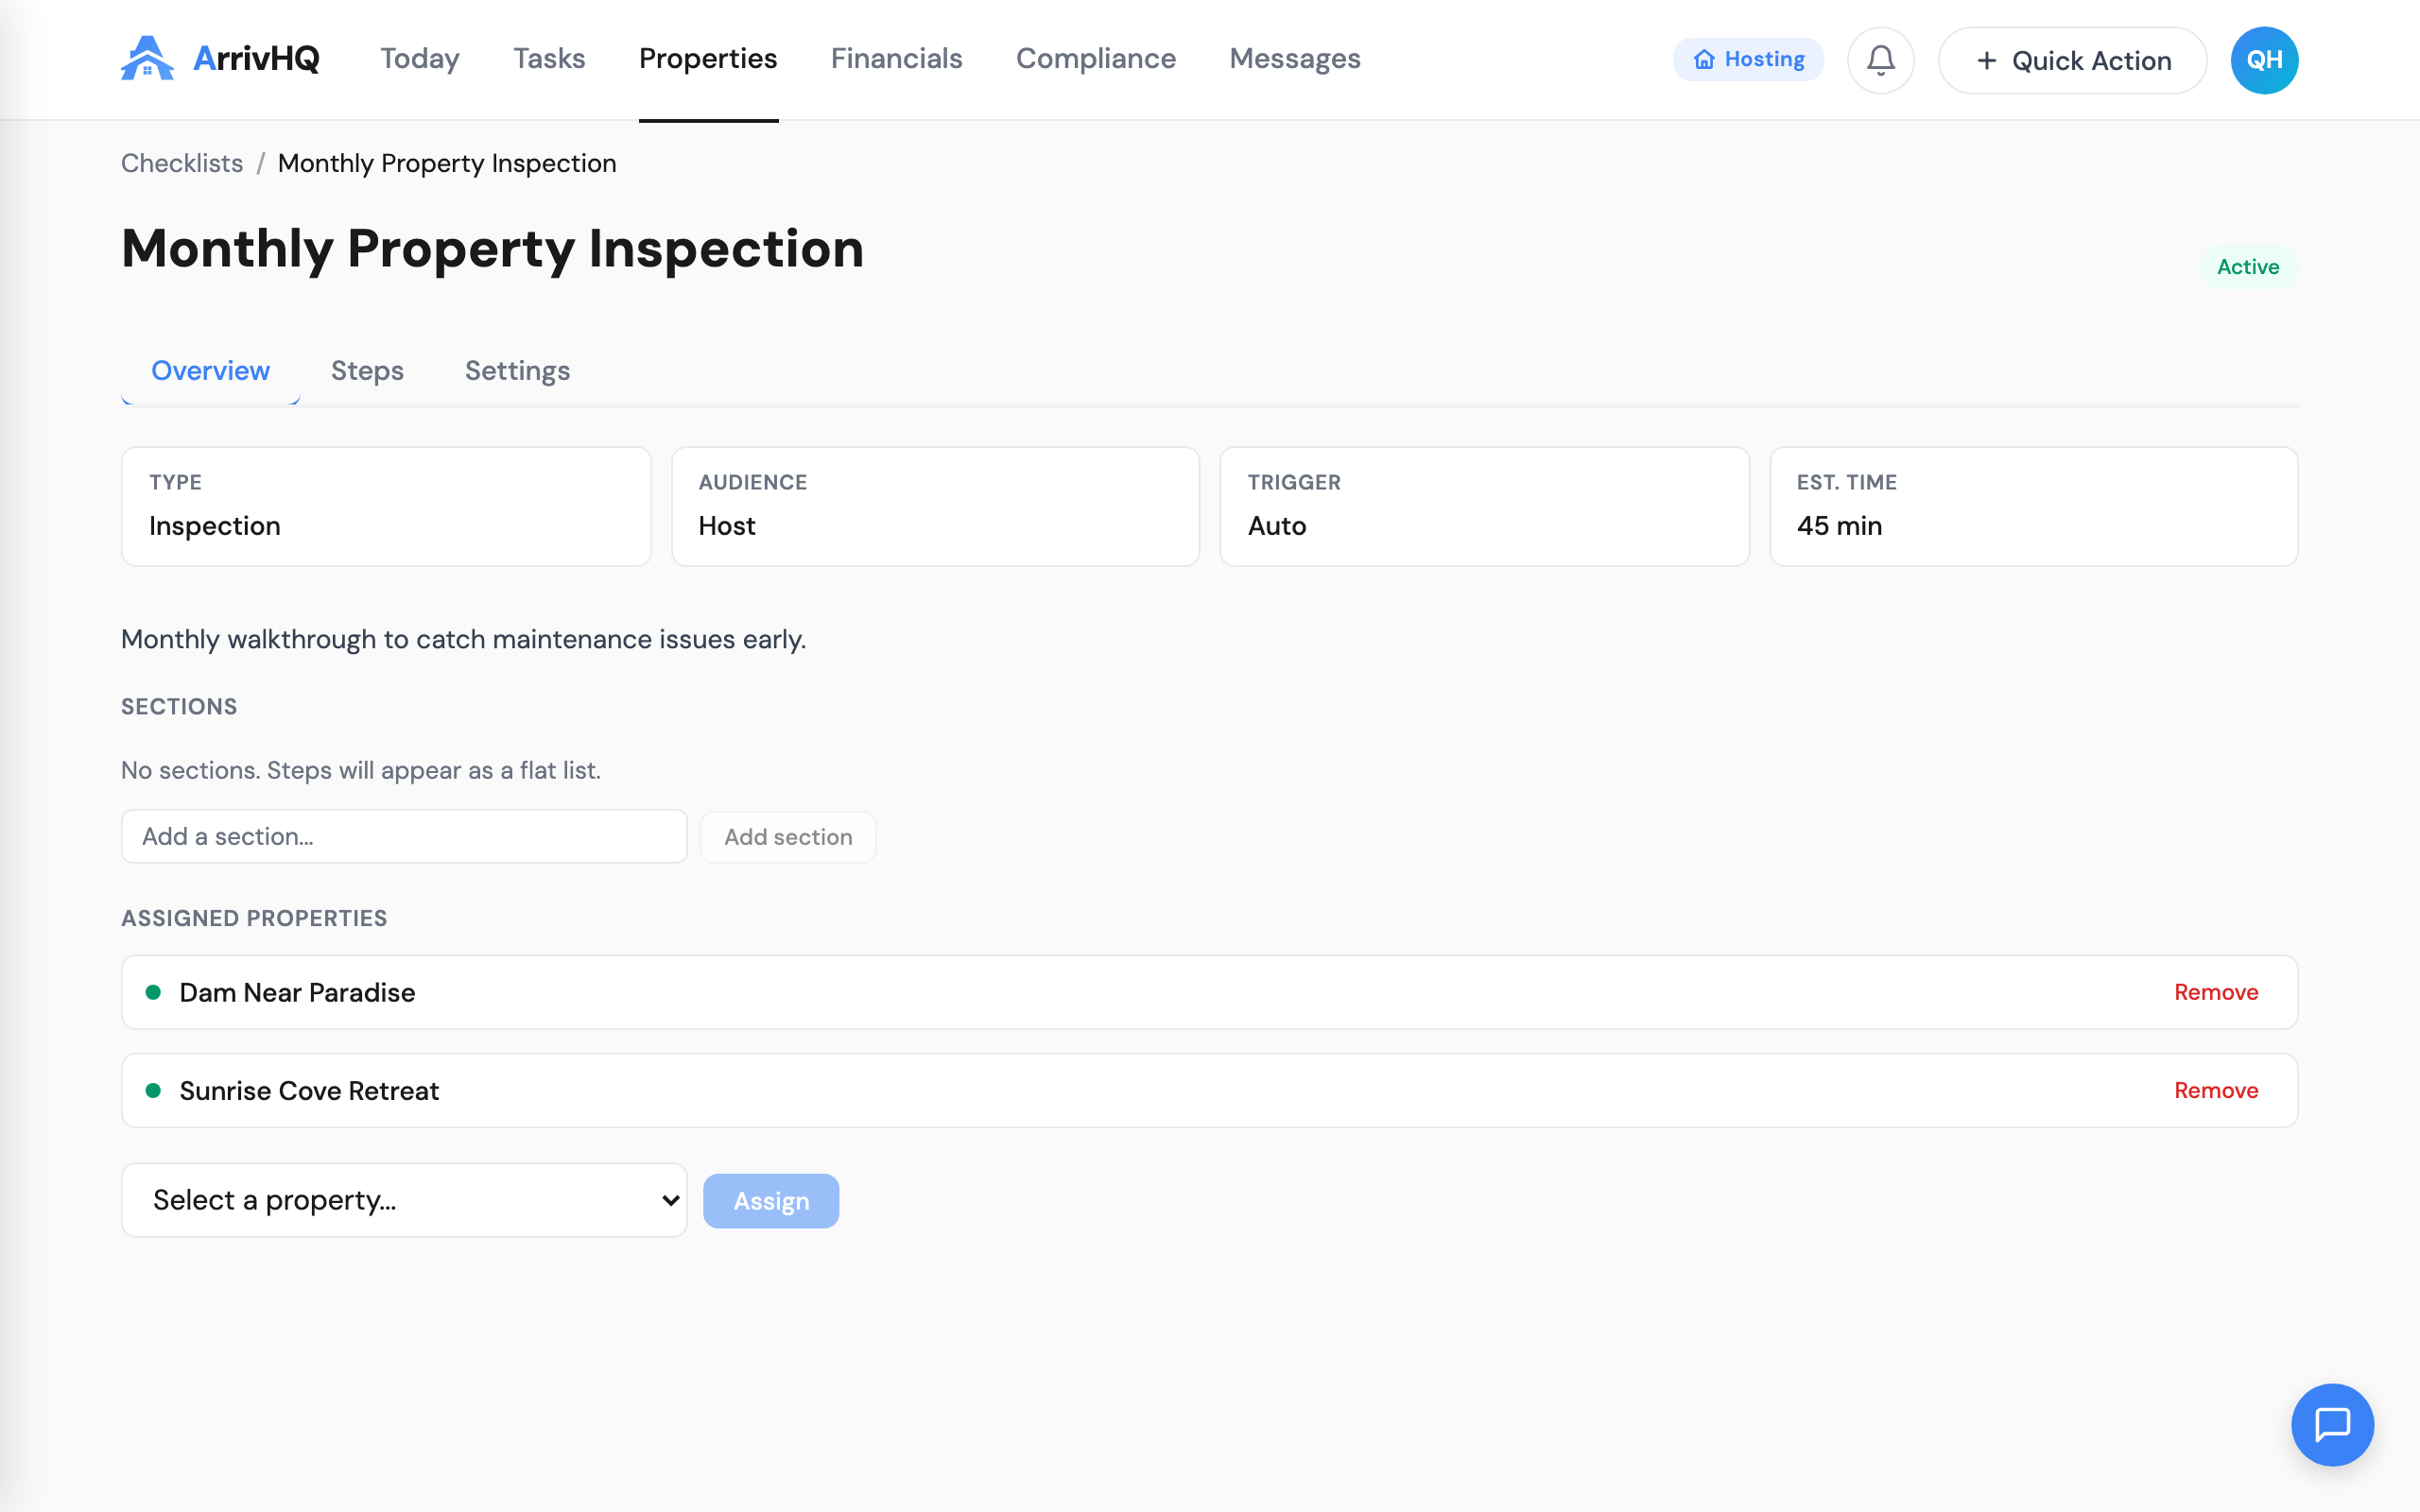
In ArrivHQ, a checklist is a single object. It contains everything: the name, the type, the audience, the sections and steps, the trigger configuration, and the property assignments. There is no separate template to manage. There is no group page. There is no schedule page.
When you edit a checklist, you are editing the source of truth. Changes propagate to future runs automatically. The checklist page in the sidebar is the only place you need to go. This is not a simplification that removes power — it is a simplification that removes indirection.
Creation wizard: two steps, not five
Creating a new checklist is a two-step process. The first step covers basics: name, type, audience, and description. The second step is where you build out sections and steps.
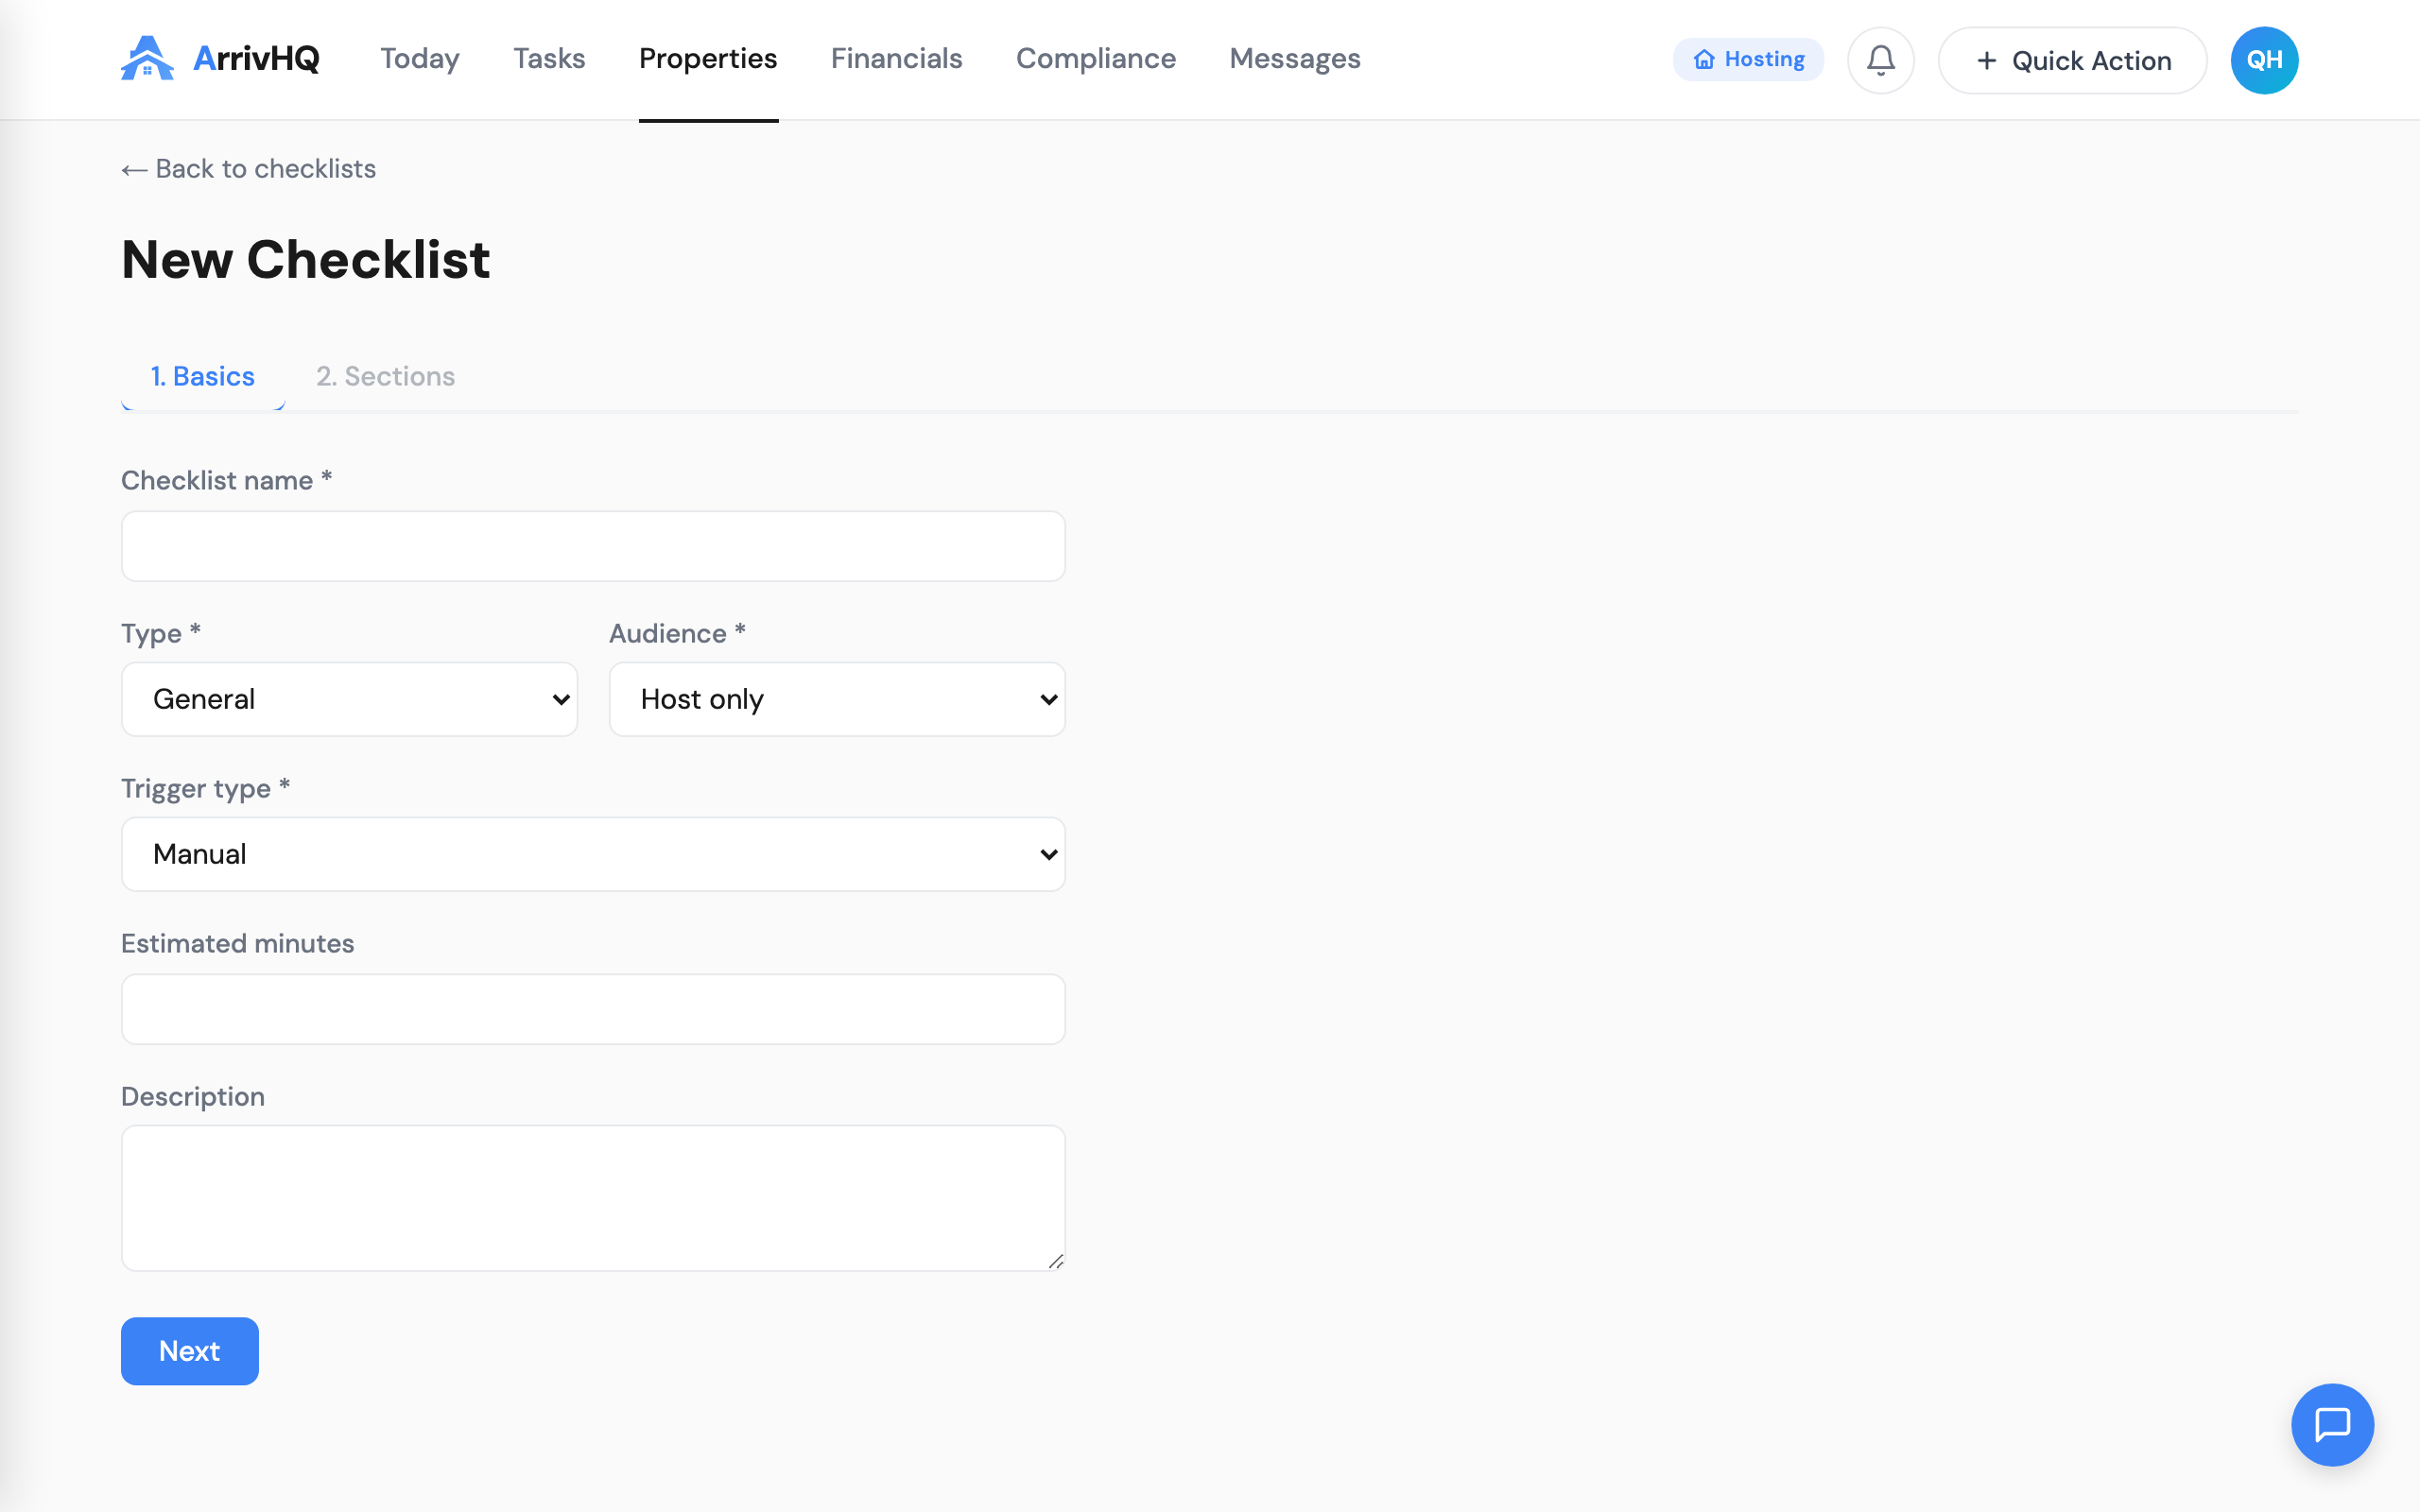
There is no step for scheduling, grouping, or assignment during creation. Those are configured on the checklist itself after it exists. This keeps the creation flow fast — you can have a working checklist in under a minute — while still allowing full configuration when you need it.
Sections: logical groups within a checklist
Sections let you organize steps within a checklist into meaningful groups. A turnover checklist might have sections for Kitchen, Bathrooms, Bedrooms, Living Areas, and Outdoor. An inspection checklist might have sections for Safety Equipment, Appliances, Structural, and Cosmetic.
Sections are optional. A simple five-step checklist does not need them. But for a 30-step turnover with different areas of the property, sections make the difference between a wall of checkboxes and a structured workflow that guides the person through the property in a logical order.
Each section can be collapsed and expanded. When a cleaner finishes the kitchen and moves to the bathrooms, they collapse the kitchen section. Completed sections show a visual indicator so managers reviewing the checklist can see progress at a glance without reading every line.
Eleven audience-neutral types
Checklists have a type that describes their operational purpose. ArrivHQ supports eleven types: check-in, check-out, turnover, maintenance, inspection, safety, inventory, onboarding, offboarding, recurring, and custom.
These types are audience-neutral. A check-in checklist can be assigned to guests, to host staff, or to both. A maintenance checklist is typically host-only, but nothing prevents you from including guest-facing steps if your workflow requires it. The type describes what the checklist is for, not who completes it.
Types also drive the color coding and iconography throughout ArrivHQ. When a check-in checklist appears on the Today page, it carries the same visual treatment regardless of whether it is guest-facing or host-facing. This consistency means you learn one visual language, not two.
Trigger configuration: manual, event-based, or recurring
Every checklist has a trigger setting that determines when new runs are created. There are three modes.
Manual — runs are created only when someone explicitly creates one. Useful for ad-hoc inspections, damage assessments, or any workflow that does not follow a schedule.
Reservation event — runs are created automatically when a reservation event occurs. You choose the event type: check-in, check-out, or turnover. When ArrivHQ detects a matching reservation event, it creates a checklist run, assigns it to the configured team members, and sets the due date based on the reservation timing.
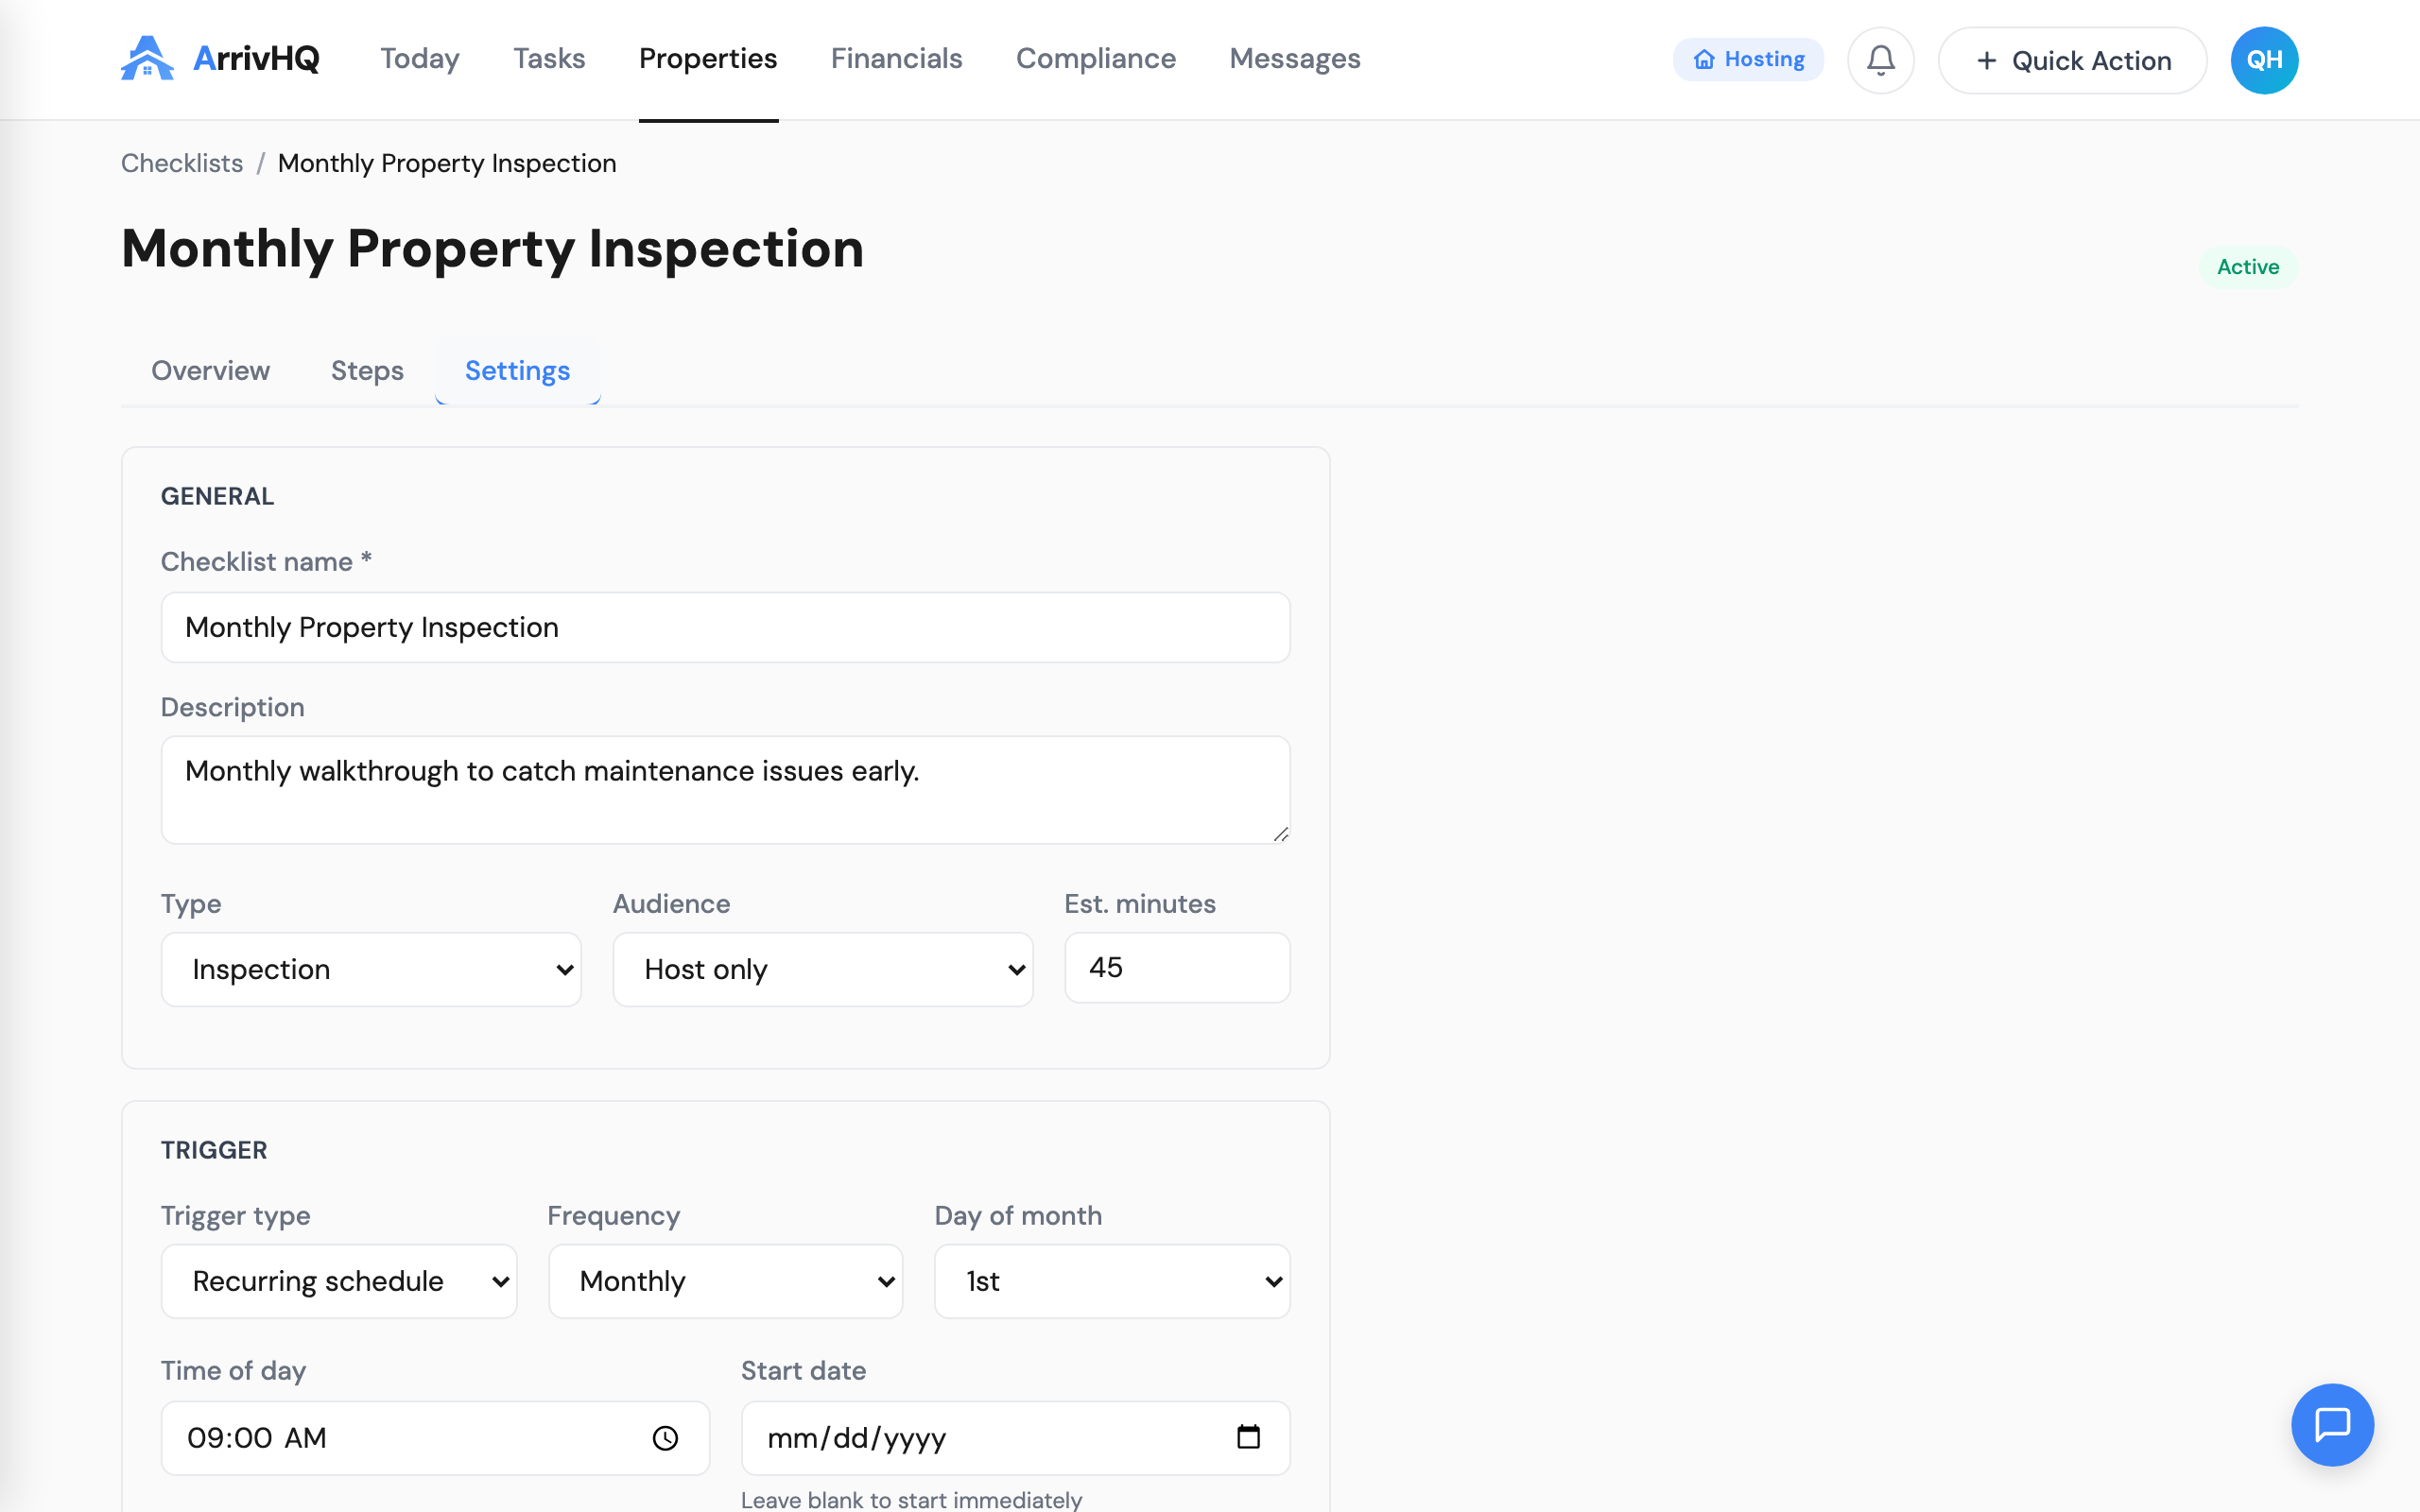
Recurring — runs are created on a schedule. You configure the frequency (daily, weekly, biweekly, monthly), the day of the week or month, and the time of day. Useful for safety inspections, HVAC filter changes, pool maintenance, or any task that repeats on a calendar cadence regardless of reservations.
The trigger configuration lives on the checklist itself, not on a separate schedules page. To change when a checklist runs, you open the checklist and change the trigger. One place.
Property assignments: configure once
Each checklist is assigned to one or more properties. When a trigger fires — a reservation event occurs or a recurring schedule hits — ArrivHQ creates runs only for the assigned properties. Assign a turnover checklist to three of your five properties, and only those three generate runs.
Property assignments are set on the checklist and persist until you change them. There is no need to re-assign after editing steps or changing the trigger. Add a new property to your account, assign it to your existing checklists, and automation kicks in immediately.
For teams using property-level roles, checklist runs are automatically assigned to the team members who have the appropriate role on that property. A turnover checklist assigned to a property where Jane is the cleaner will generate runs assigned to Jane. No manual assignment required for each run.
Host e-sign: agreement steps
Any step in a checklist can be configured as an agreement step. When completed, these steps create a legally binding acknowledgment record — timestamped, with the user's identity attached. This is useful for safety acknowledgments, property condition agreements, and compliance documentation.
Agreement steps appear with distinct styling in the completion flow. The person completing the checklist sees the agreement text and must explicitly confirm. The resulting record is stored separately from regular step completions and is available for export.
Navigation: one place in the sidebar
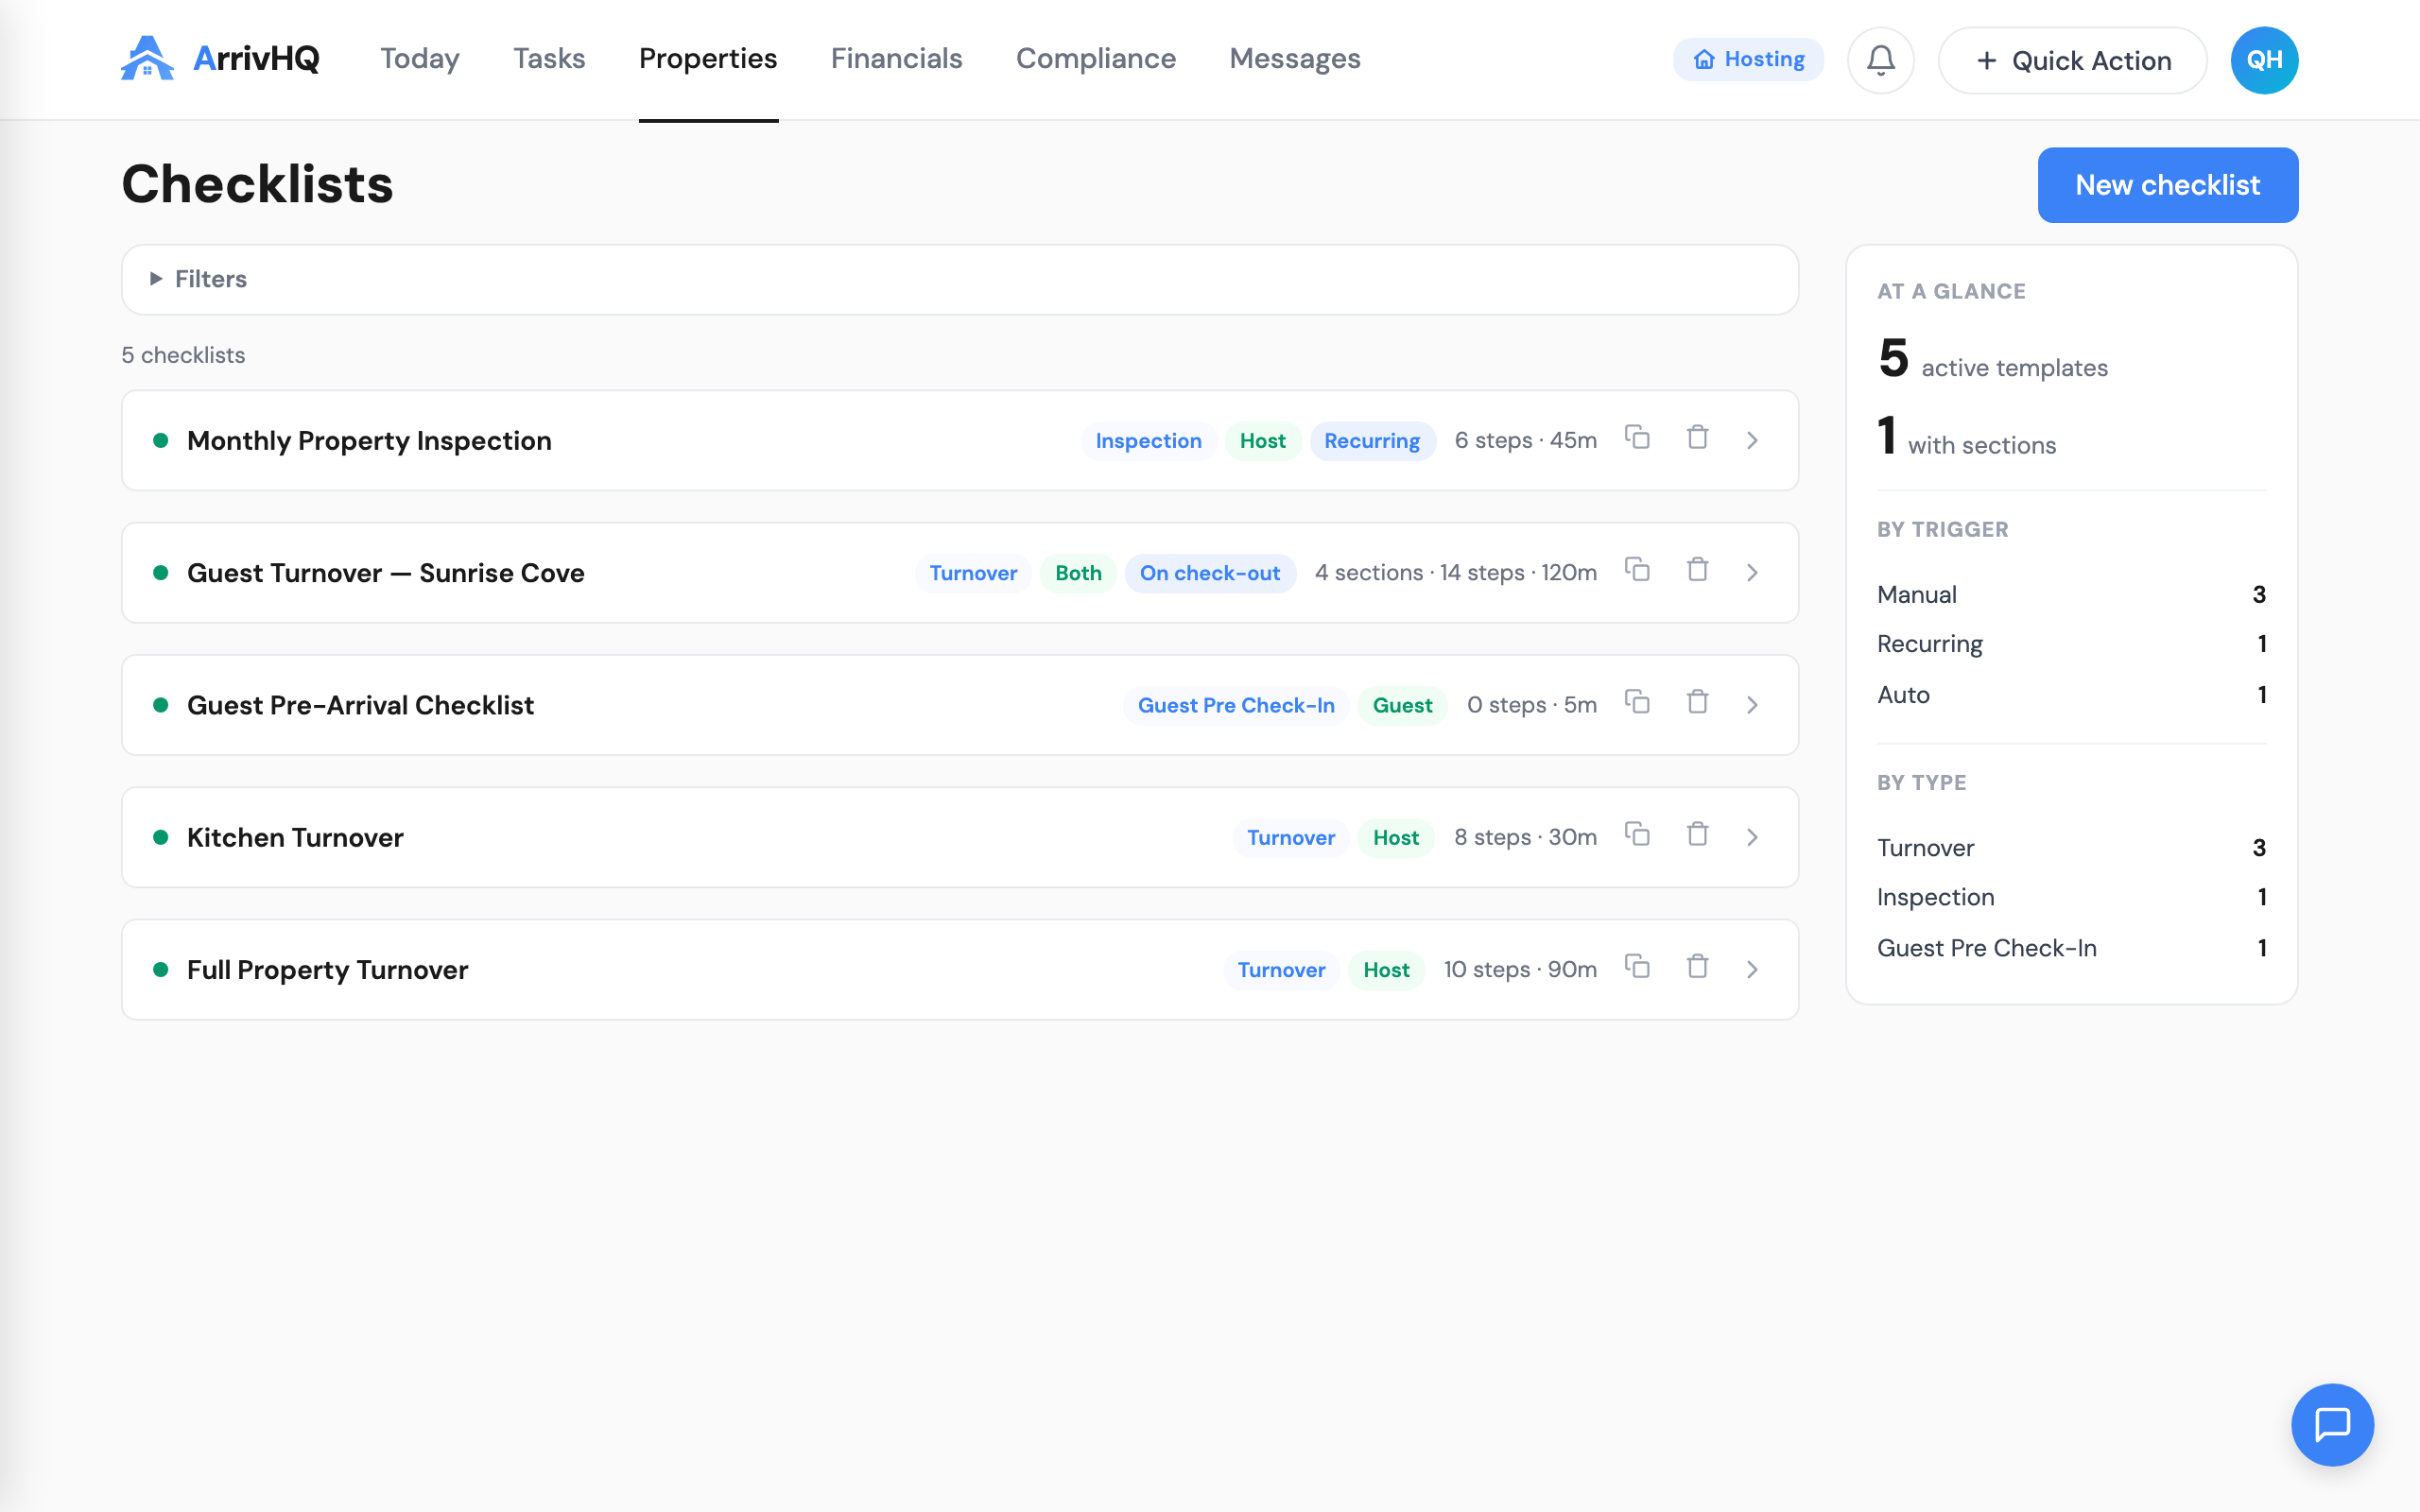
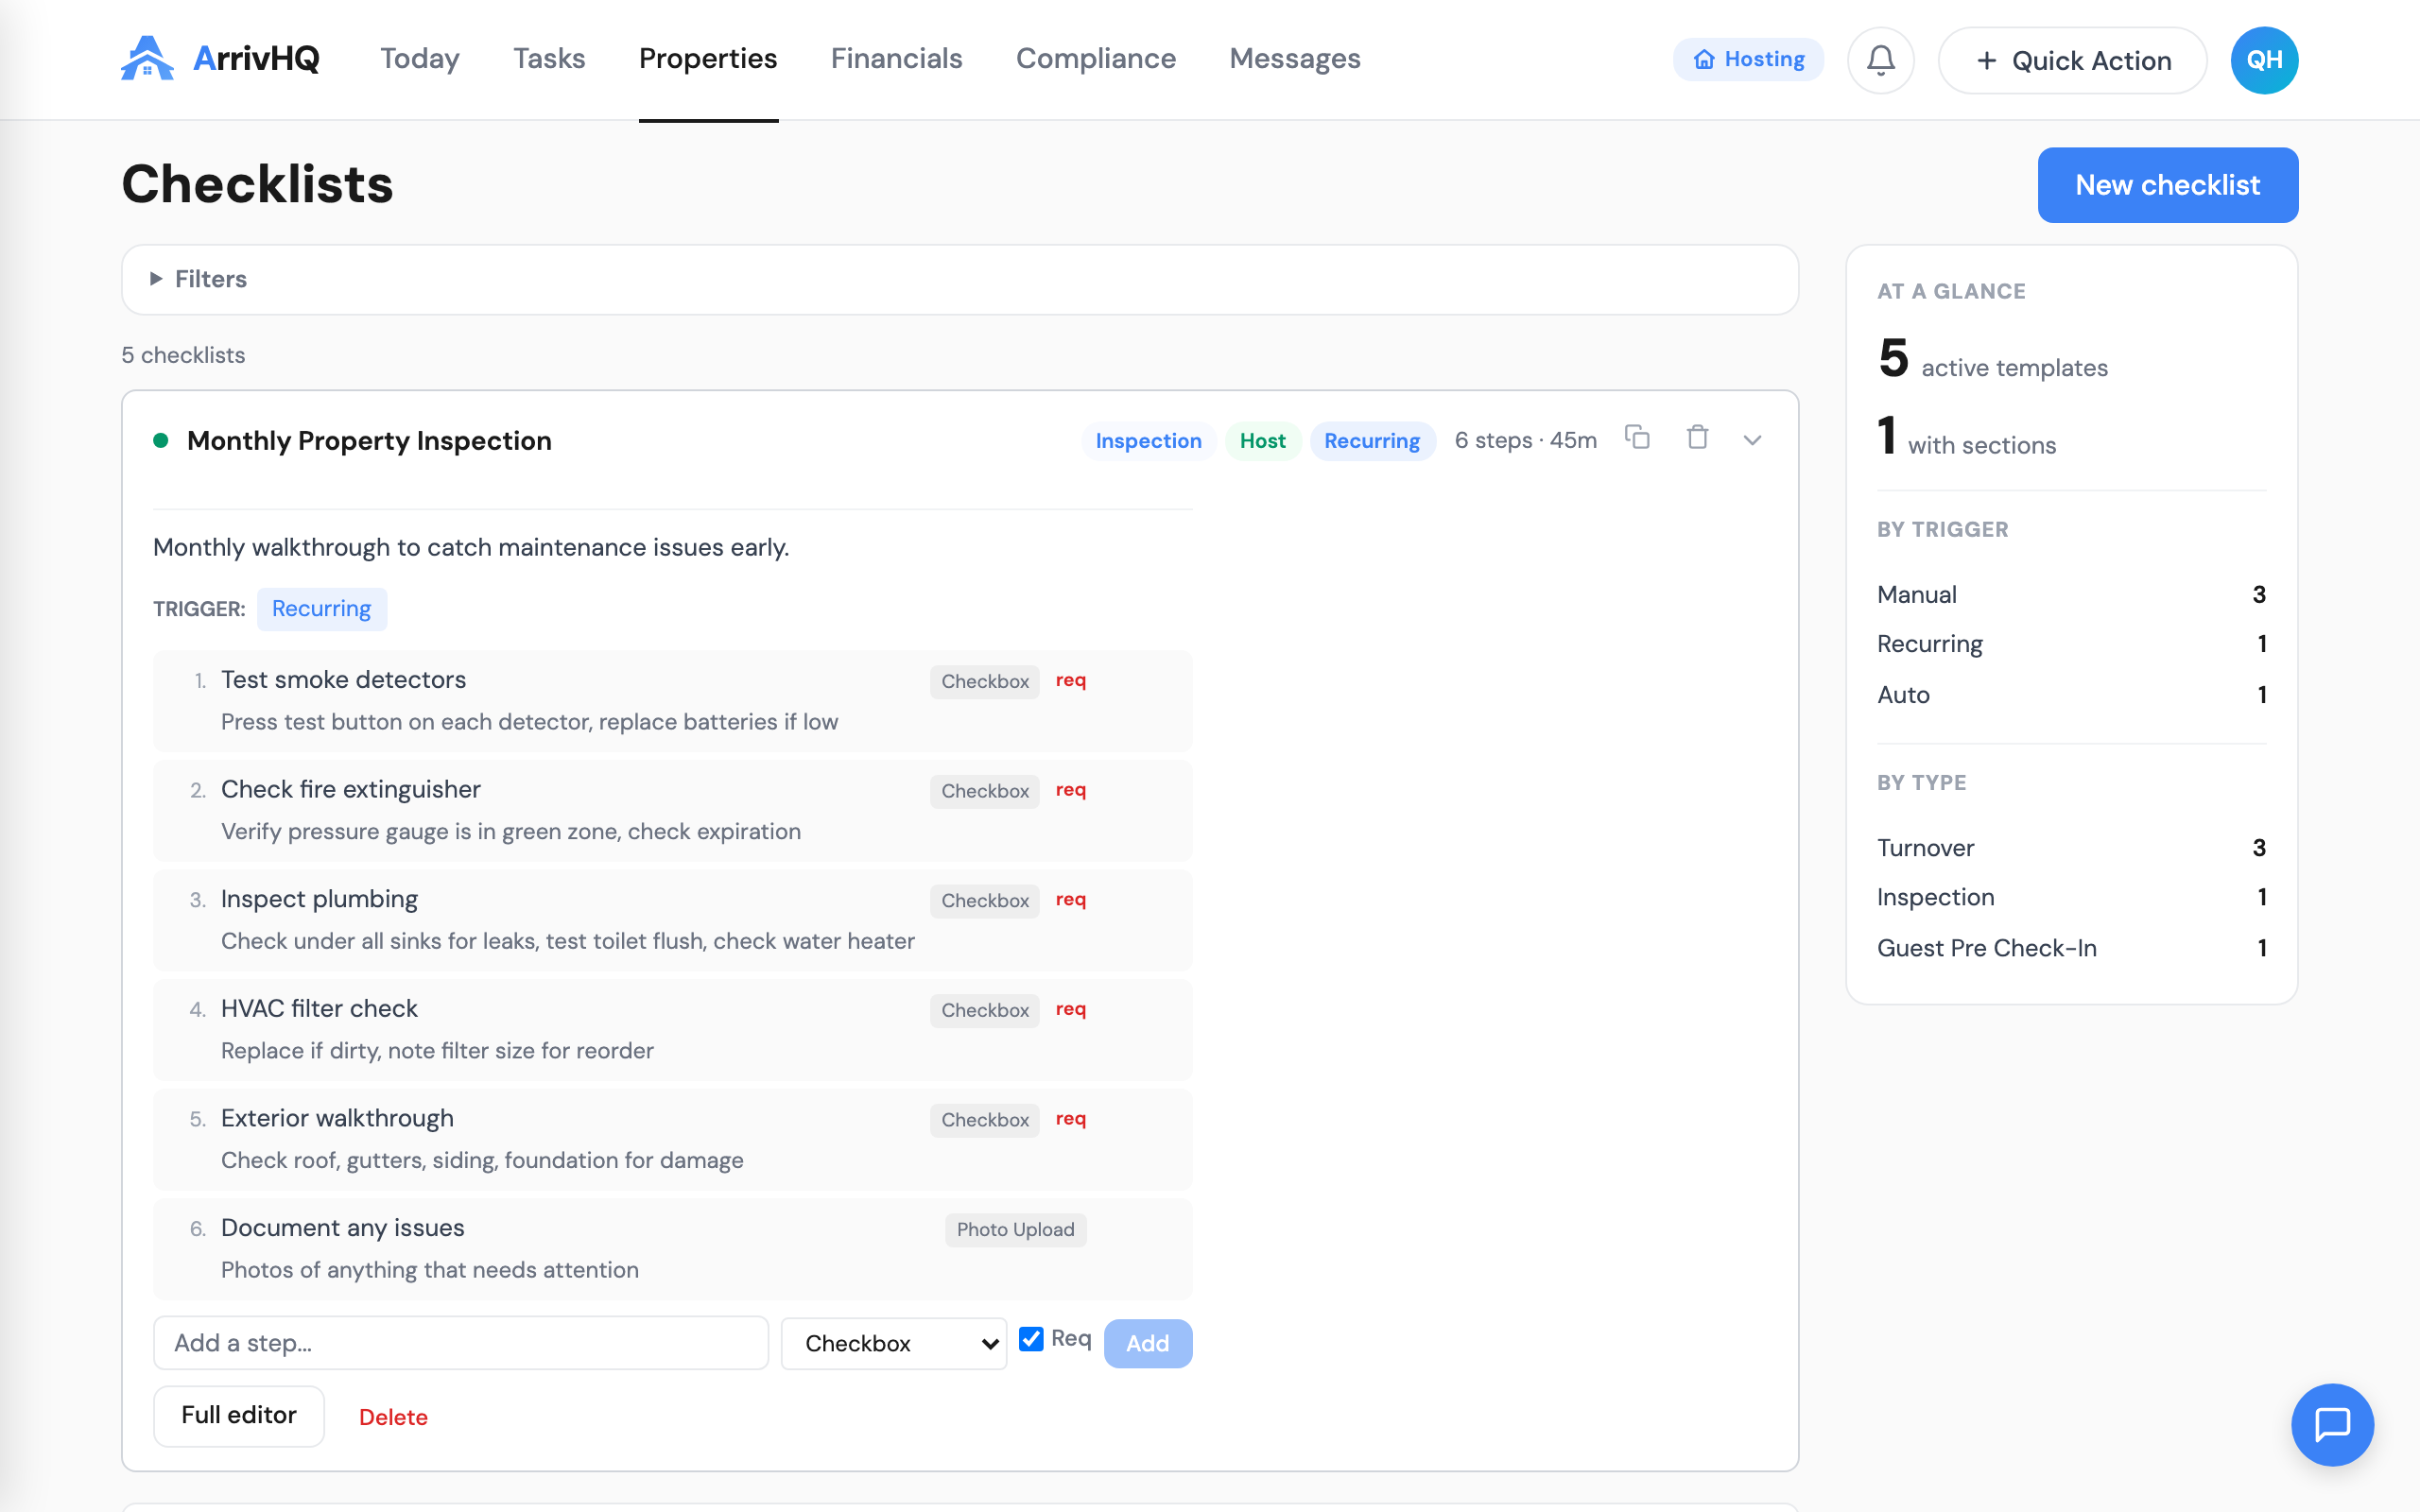
Checklists now live as a single item in the sidebar navigation. The old Groups page is gone. The old Schedules page is gone. Clicking Checklists shows your list of checklists with their types, property assignments, trigger settings, and recent run status — all visible in the list view.

From the list, you can create a new checklist, edit an existing one, view recent runs, or check completion statistics. Everything that used to be spread across three pages is now on one page with contextual detail panels.
For hosts upgrading from the old model, existing templates have been migrated to the unified format. Your steps, sections, and property assignments are preserved. The only visible change is that the Groups and Schedules sidebar items are gone, replaced by a single Checklists entry that does everything those three pages used to do.
Why this matters
Simplicity is not about having fewer features. It is about having fewer places to look. The unified checklist model has the same capabilities as a template-plus-group-plus-schedule system — types, sections, triggers, assignments, agreement steps, audience control — but it puts all of them on one object, managed in one place.
The result is less time configuring and more time operating. When something needs to change, you know exactly where to go. When something breaks, there is one place to check. When a new team member asks "how do checklists work," the answer is short enough to fit in a sentence: you create a checklist, add your steps, set the trigger, and assign it to properties.
Related documentation: