You already have a property on Airbnb or VRBO. Guests are booking, turnovers are happening, and somewhere in your phone is a pile of receipts you keep meaning to organize. ArrivHQ is where all of that comes together — operations, financials, guest communication, and compliance in one place. Here is how to set it up in about 30 minutes.
Create your account
Head to arrivhq.com and click Sign up. Enter your name, email, password, and an organization name -- this is just a label for your rental business (you can change it later). Select your plan (Host is recommended for most hosts) and optionally enter a discount code.
After submitting, check your inbox for a confirmation email and click the link to verify your account. Then enter your payment details in Stripe Checkout. All plans include a 14-day free trial. Your card will not be charged until the trial ends.

Once confirmed, you land on the Today dashboard — your home base for daily operations. But first, you need a property.
Add your first property
Click Properties in the top nav, then Add property. ArrivHQ walks you through a short wizard.
If you already have a property guide or welcome document as a PDF, you can upload it here — ArrivHQ extracts the details and generates structured guide sections automatically. Otherwise, click Start from scratch and enter the basics: name, address, and any notes about the property.
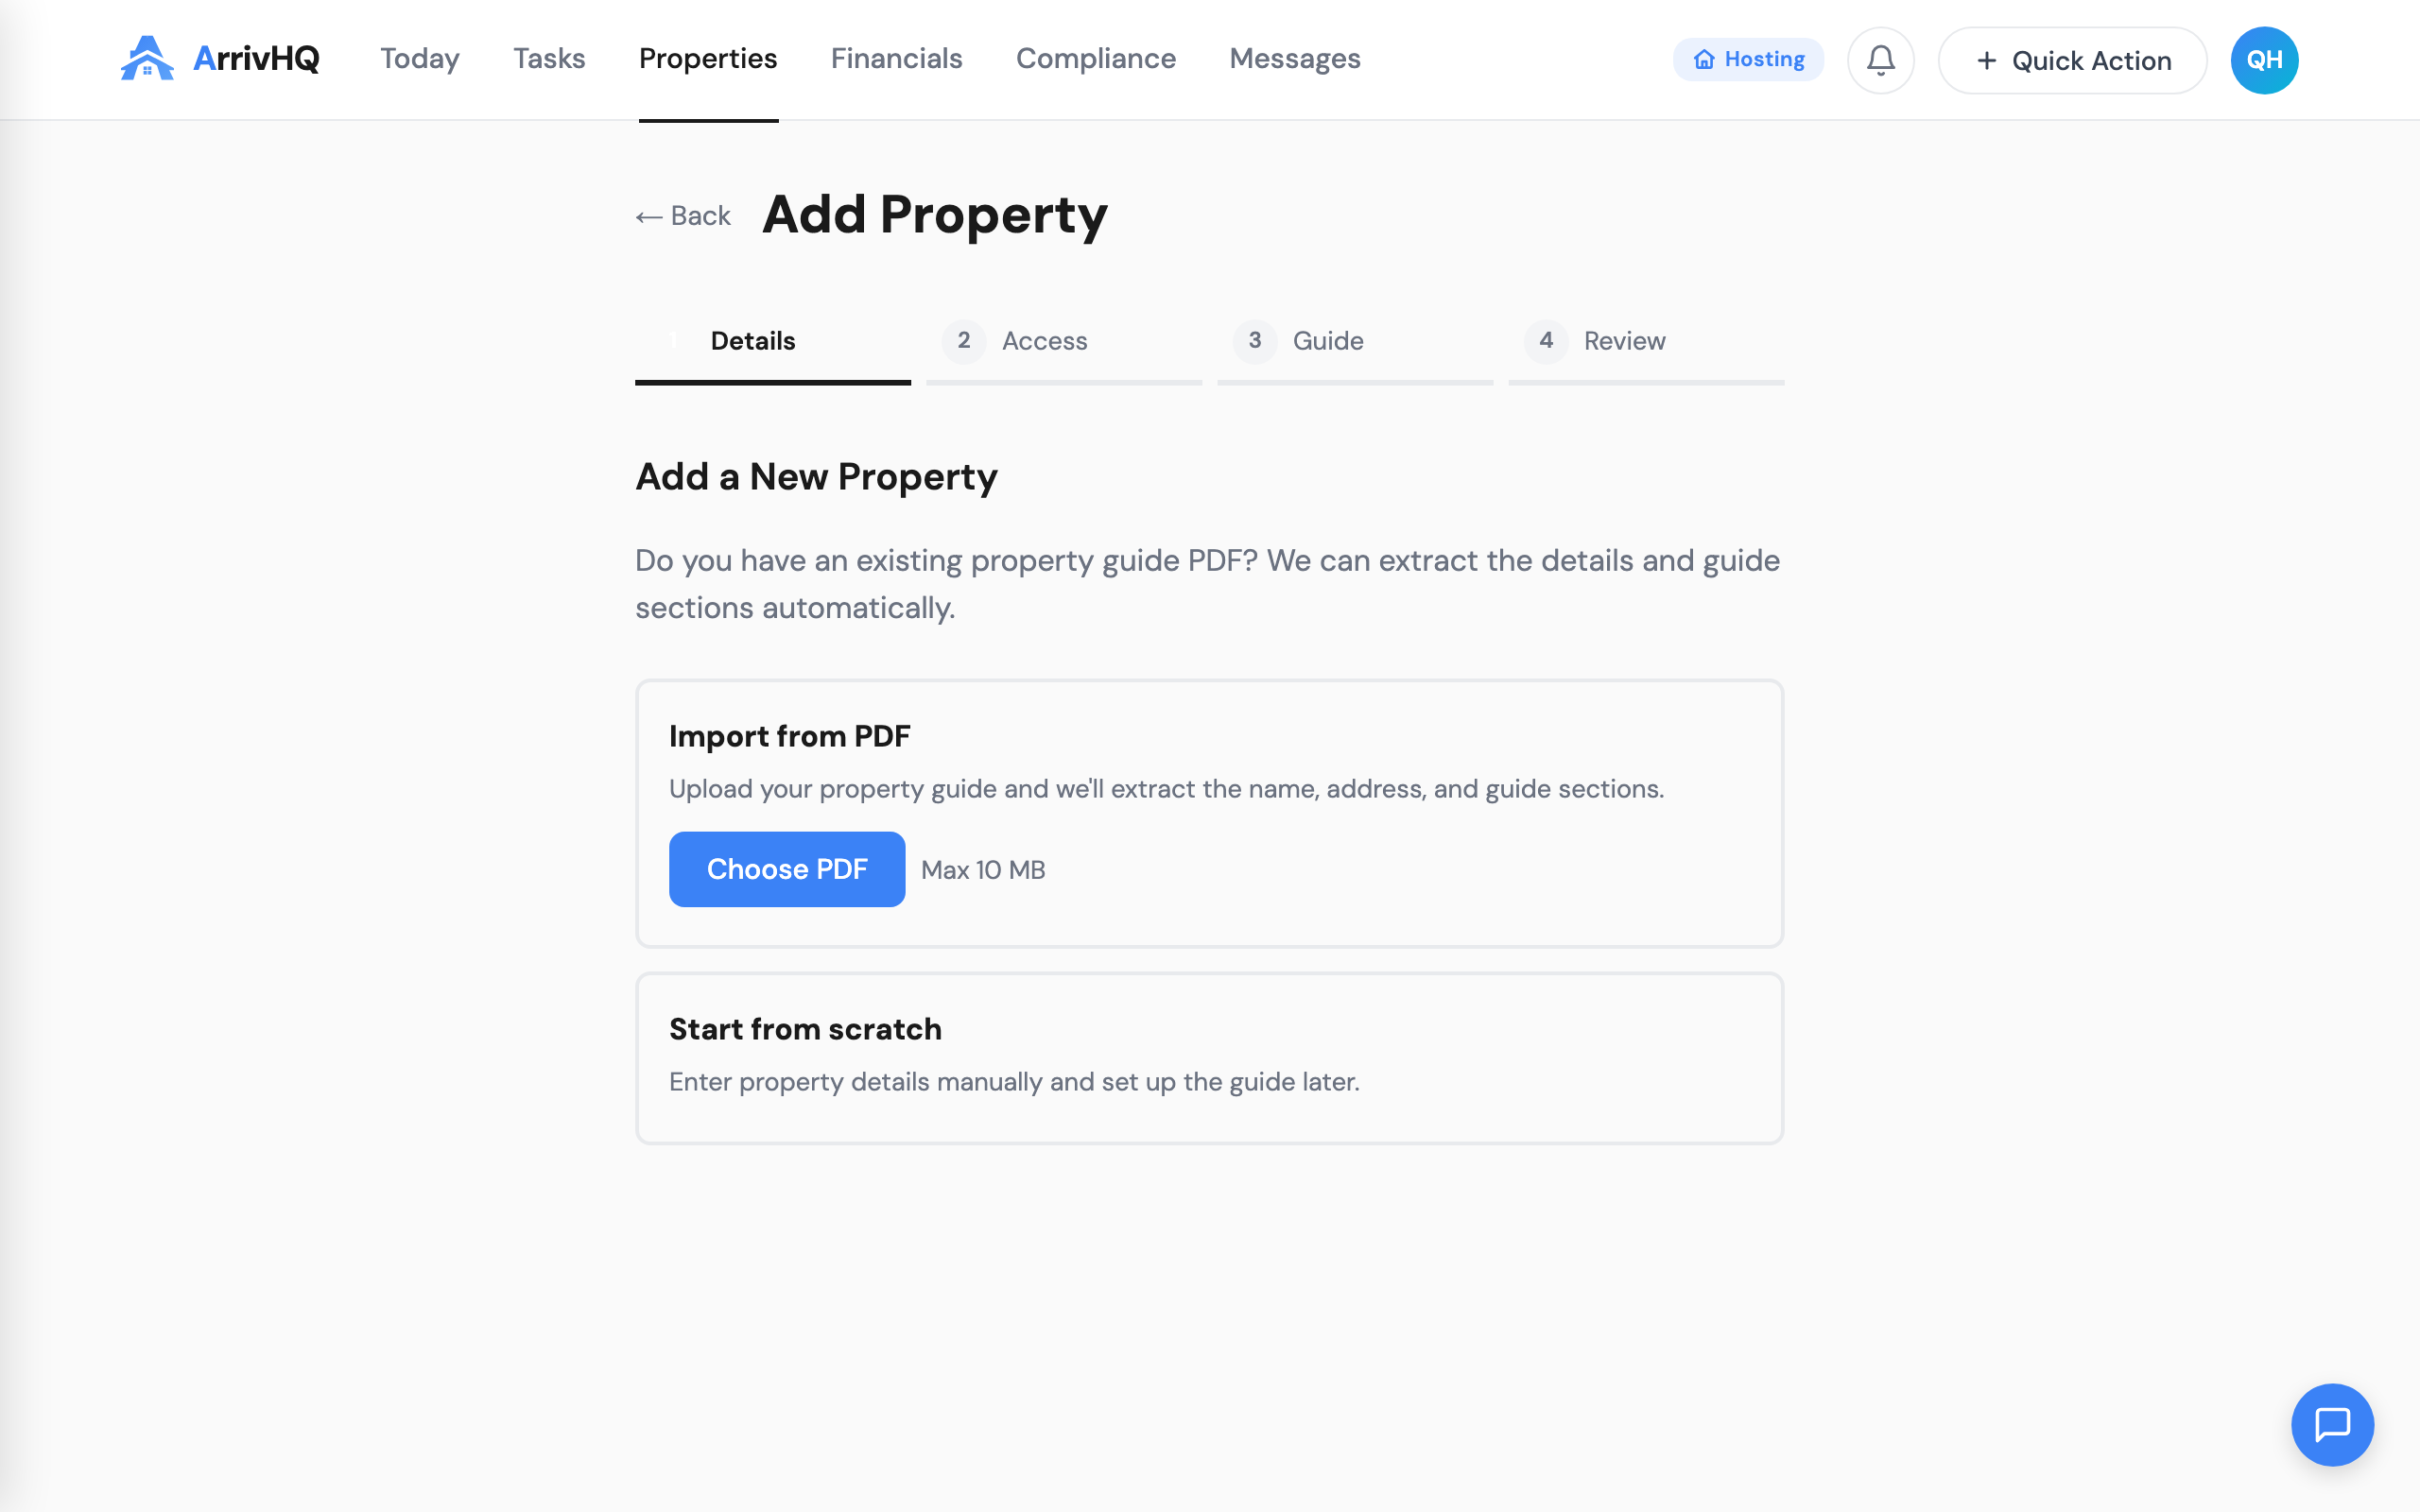
The wizard also lets you set up access codes (Wi-Fi, lockbox, keypad) and generate an AI-powered guest guide from your answers. You can skip any section and come back to it later — your property is usable as soon as you save the first step.
For full details, see the Adding a Property documentation.
Log your first expense
This is where the real value starts. Every receipt, vendor payment, and property cost you log here builds your Schedule E deduction record automatically.
Go to Financials → Expenses and click Add expense. Enter the amount, date, vendor, and a brief description. Select a category — these map directly to IRS Schedule E line items, so you are building audit-ready records from day one.
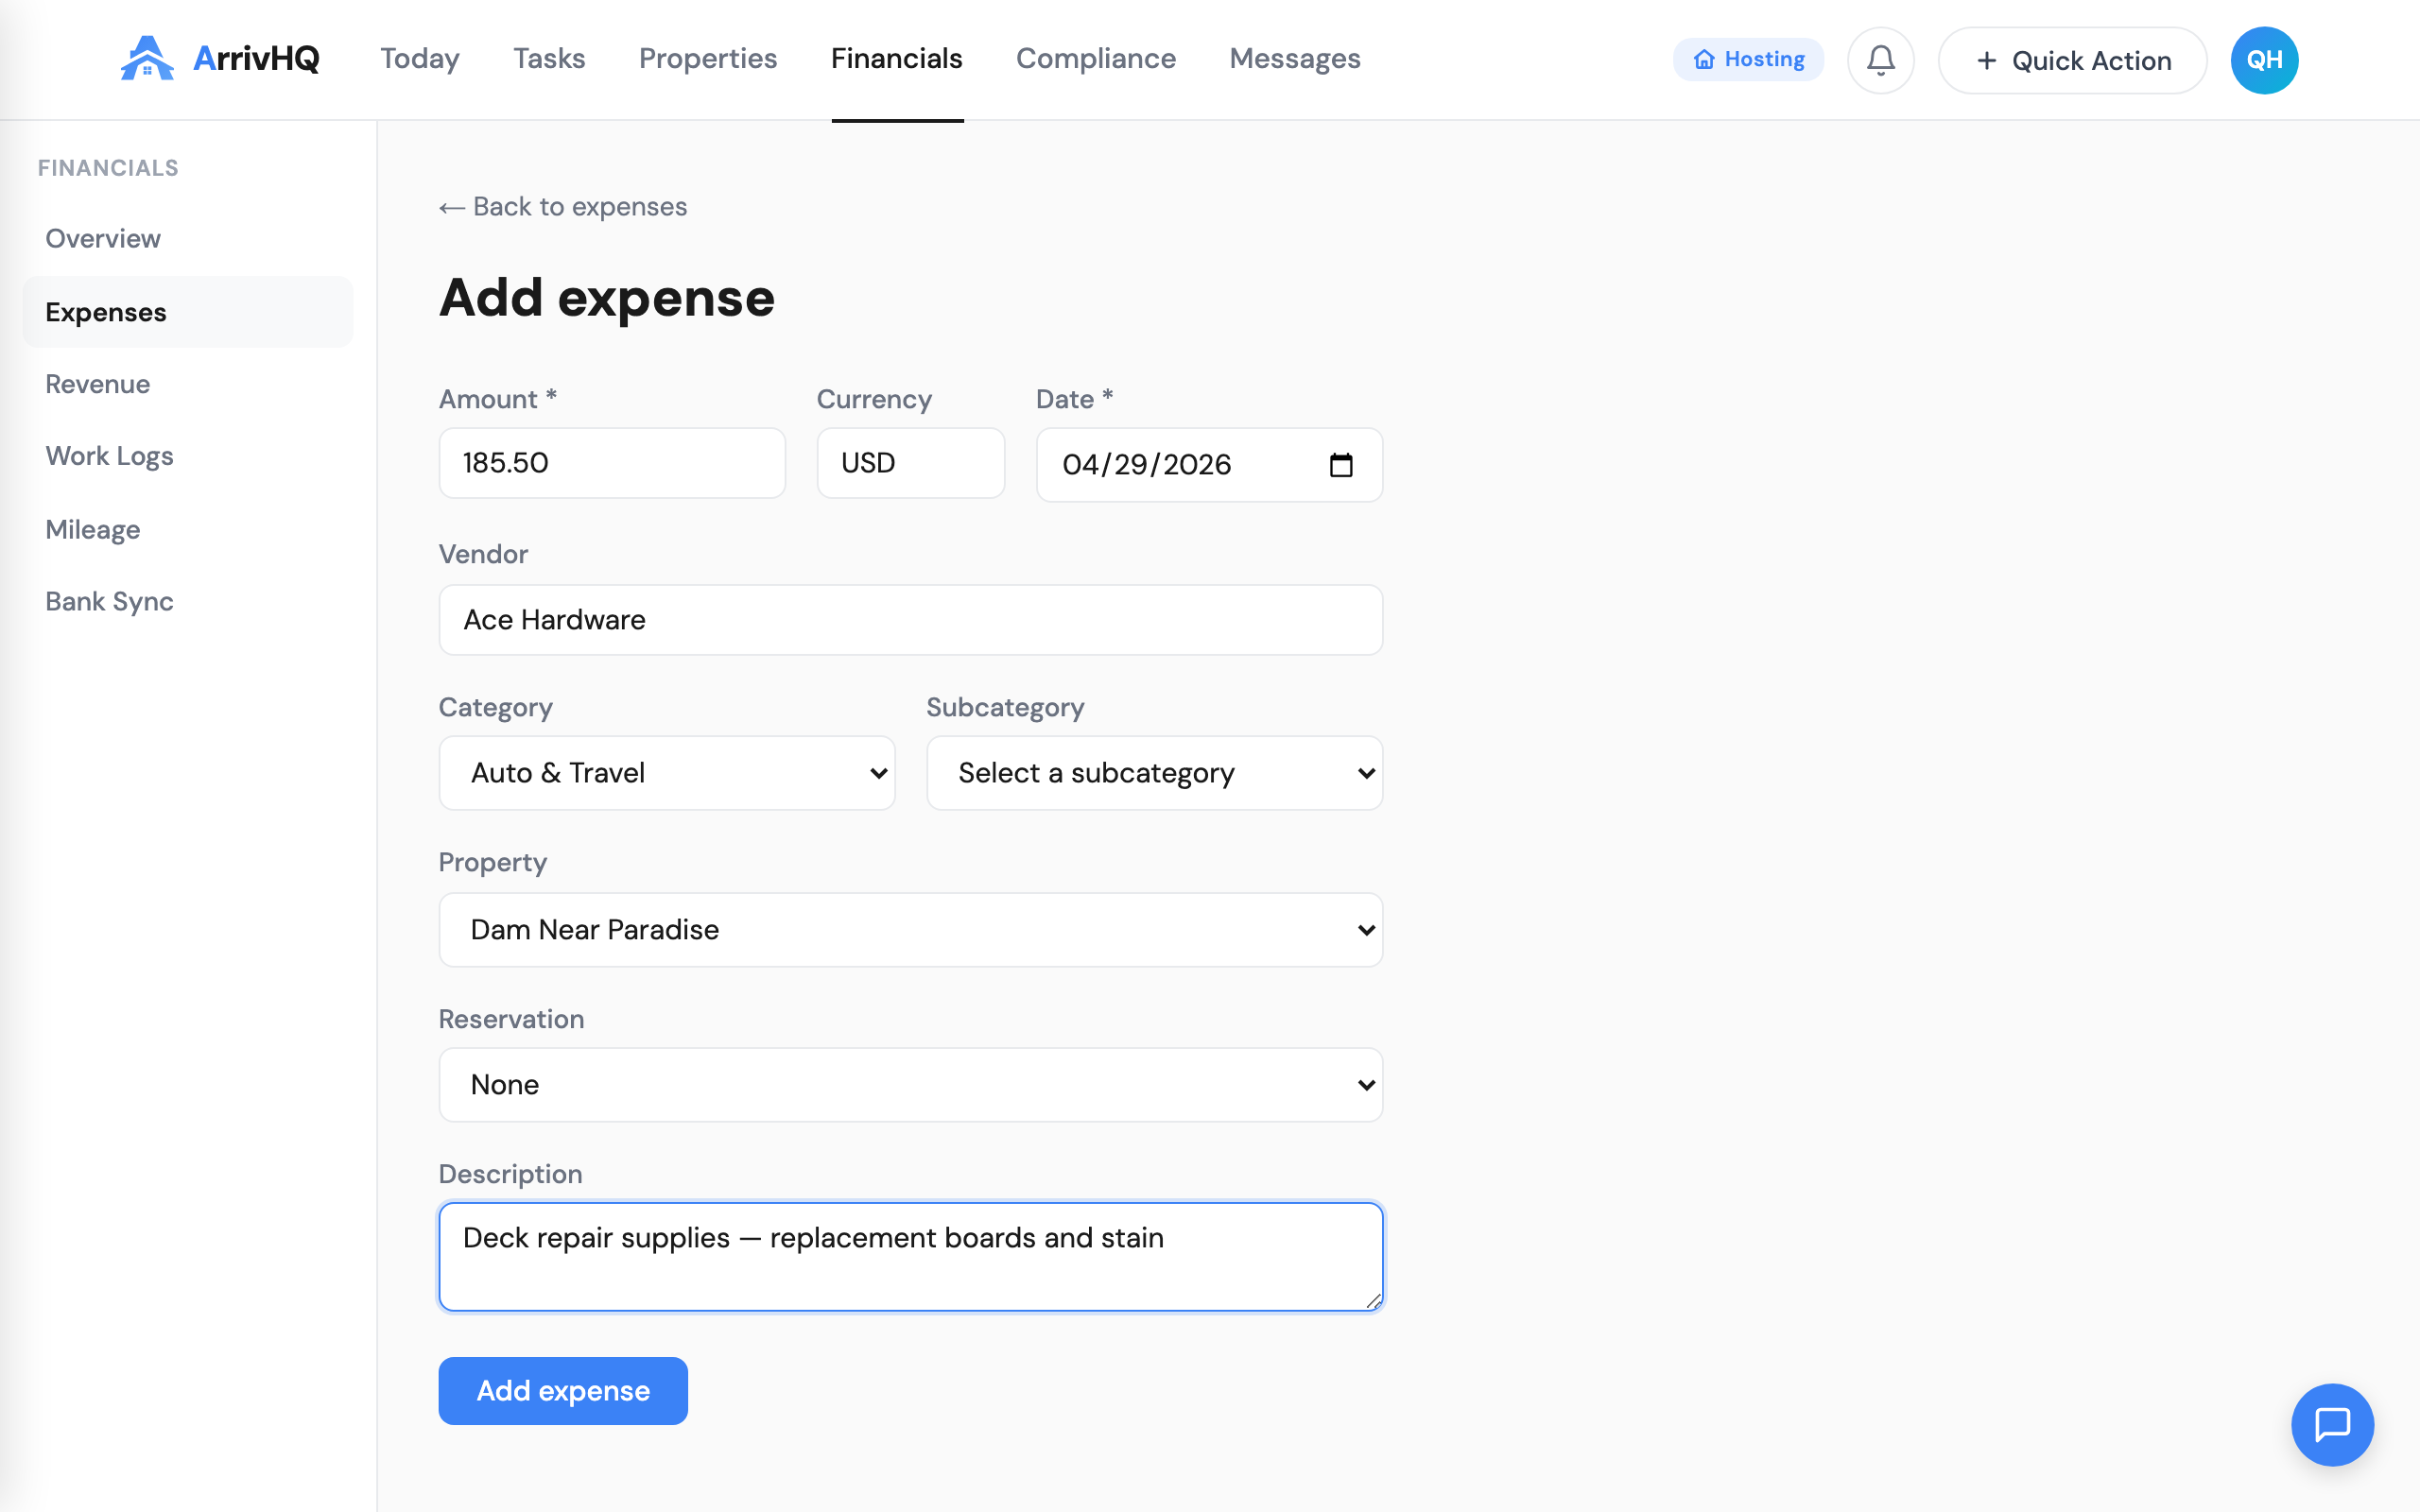
On Host and Portfolio plans, you can also upload a receipt photo and let ArrivHQ's AI extract the details for you. But even manually, each expense takes less than a minute to log.
The key habit: log expenses as they happen, not at year-end. Your future self (and your CPA) will thank you.
For category details, see the Expenses documentation.
Start your work log
If you plan to claim Real Estate Professional Status (REPS) or material participation, your work log is the single most important record you will keep. The IRS expects contemporaneous documentation — entries made at or near the time the work was done. A log reconstructed months later is significantly weaker.
Go to Financials → Work Logs and click Log work. Select an activity type (management, maintenance, cleaning, guest communication), enter the hours and date, and add a brief description of what you did.
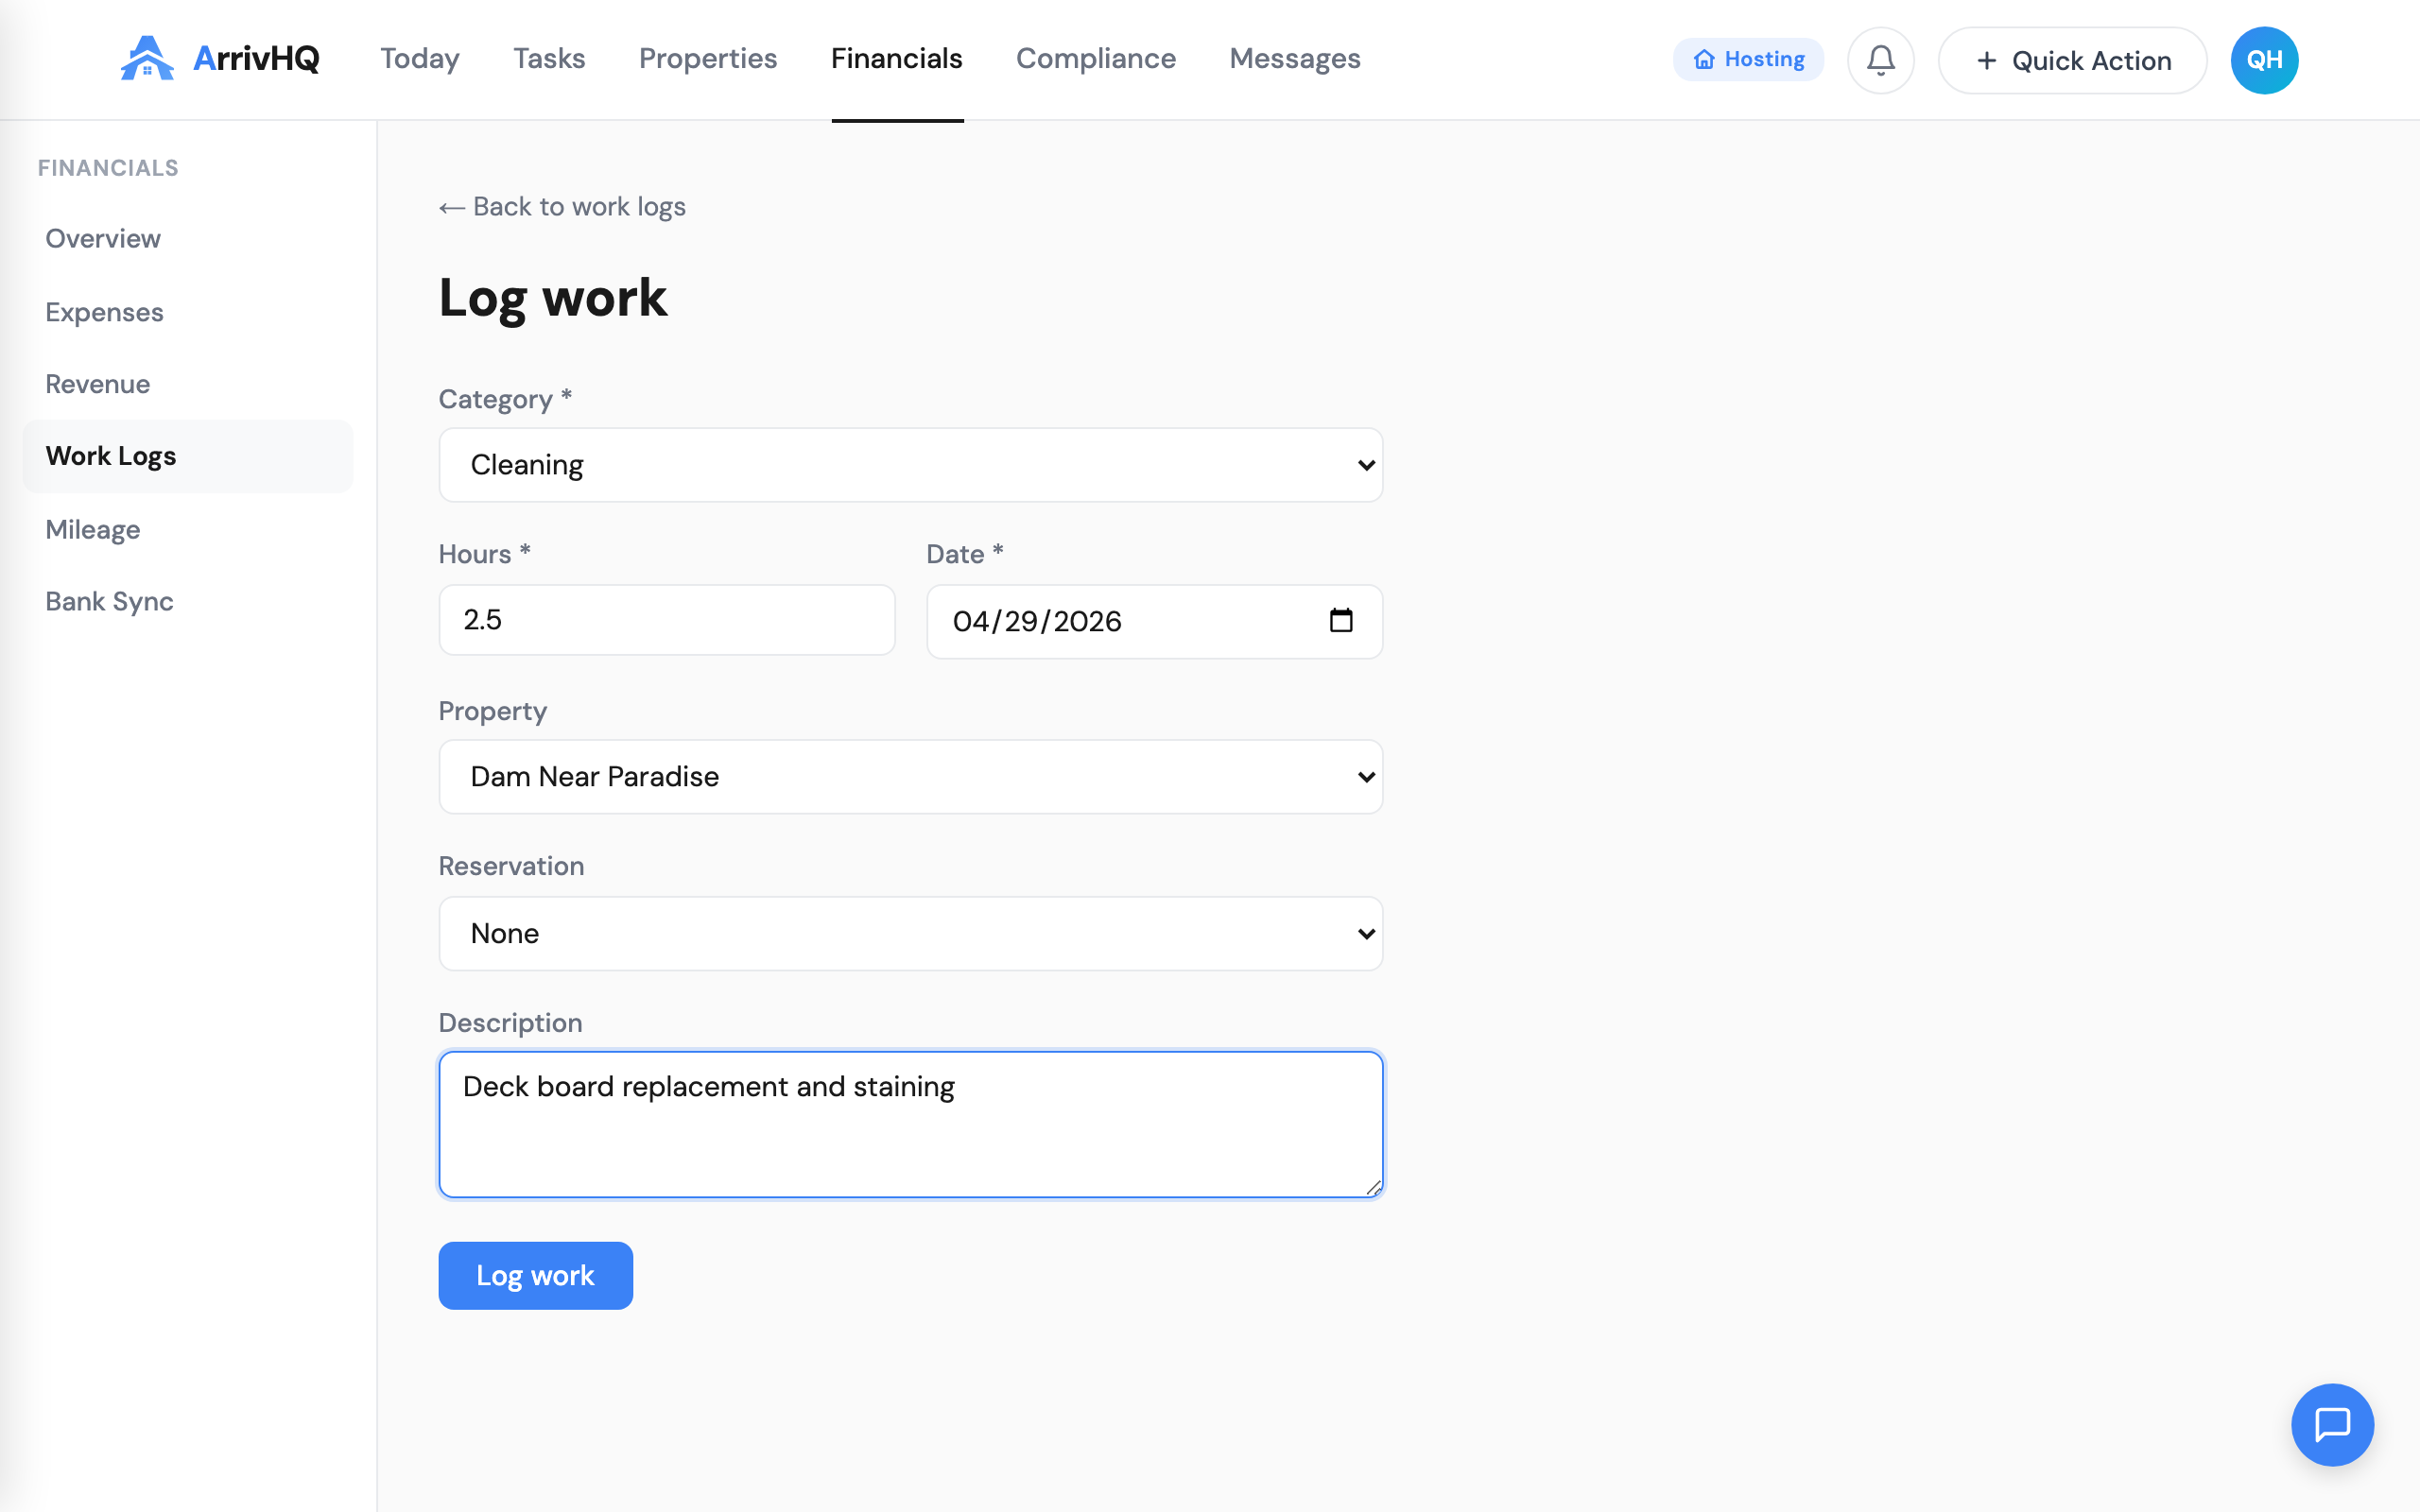
Even small tasks count. Responding to guest messages, checking your listing, coordinating with a cleaner — these are all hours that contribute to the 750-hour REPS threshold or the material participation tests. The only requirement is that you log them.
See the Work Logs documentation for the full list of activity types.
Track your mileage
Every trip to the property, every supply run, every vendor meeting — these are deductible miles. The IRS standard mileage rate makes this one of the easiest deductions to claim, but only if you have a log.
Go to Financials → Mileage and click Log mileage. Enter the date, miles driven, where you went, and the business purpose.
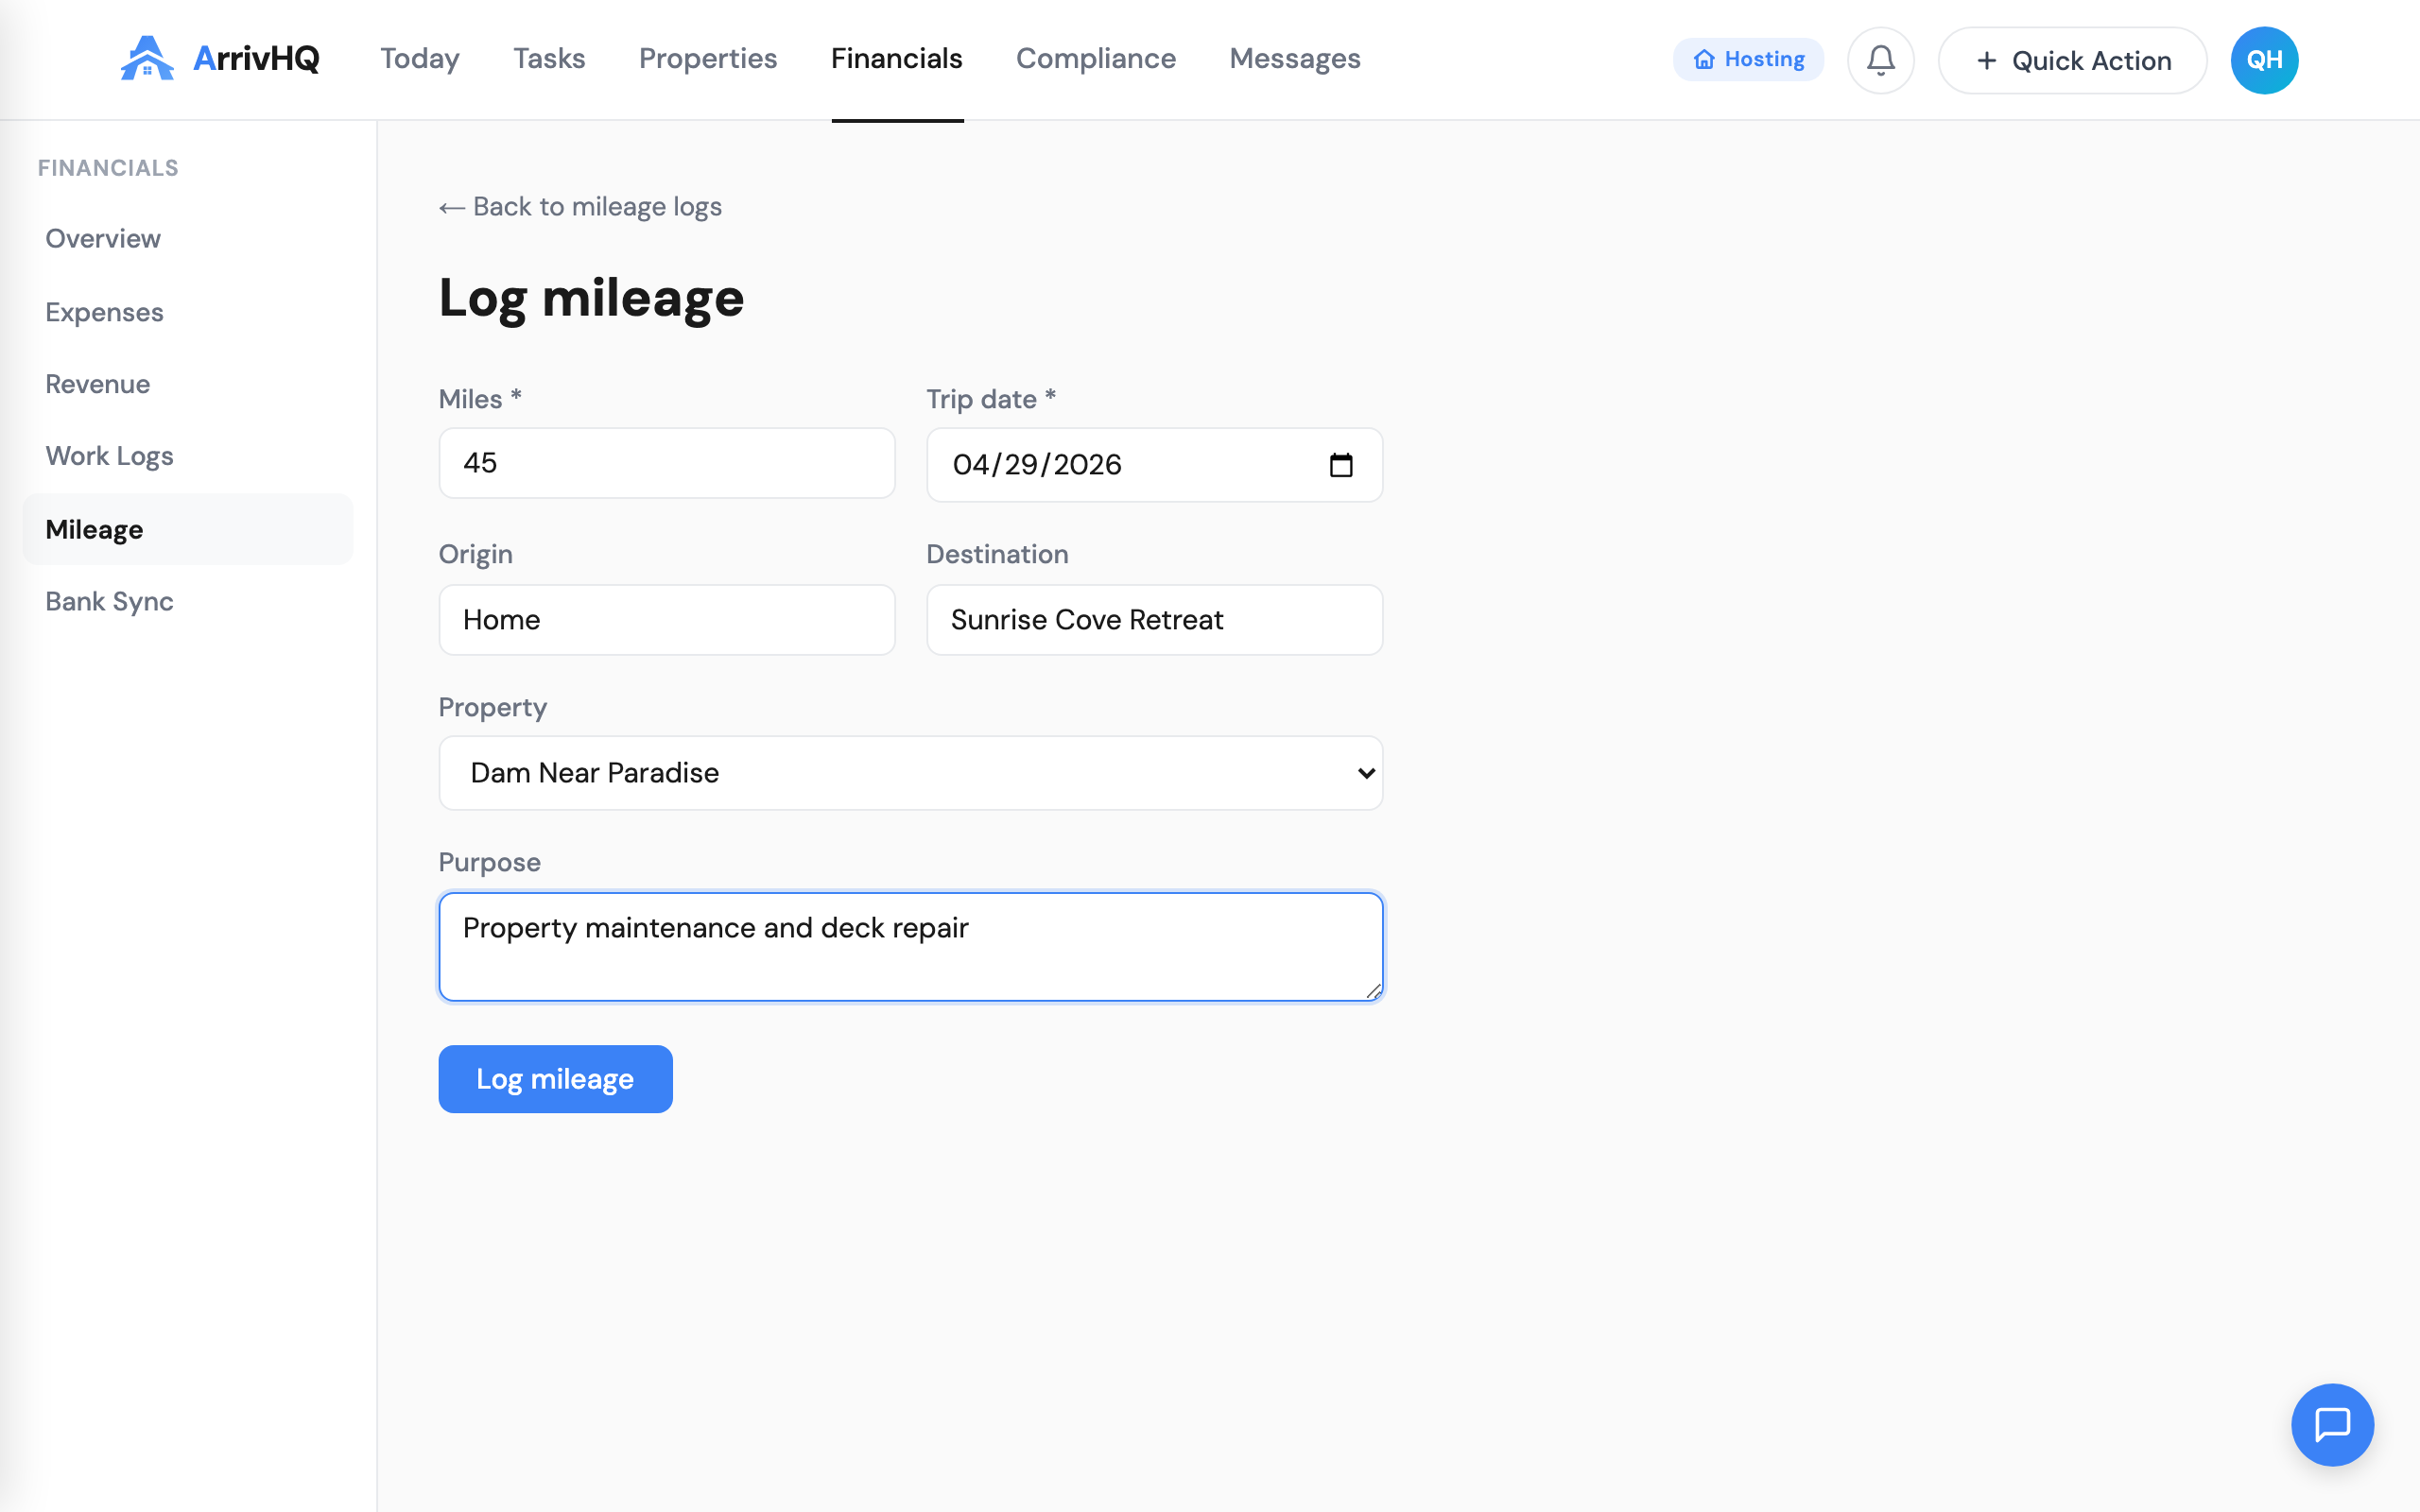
ArrivHQ stores your mileage alongside your other financial records, so when it is time to file, everything is in one place. No separate spreadsheet, no guessing at year-end.
See the Mileage documentation for details.
Check your compliance dashboard
Once you have some data flowing in — even just a few expenses and work hours — visit the Compliance section. This is where ArrivHQ pulls everything together into a single view.
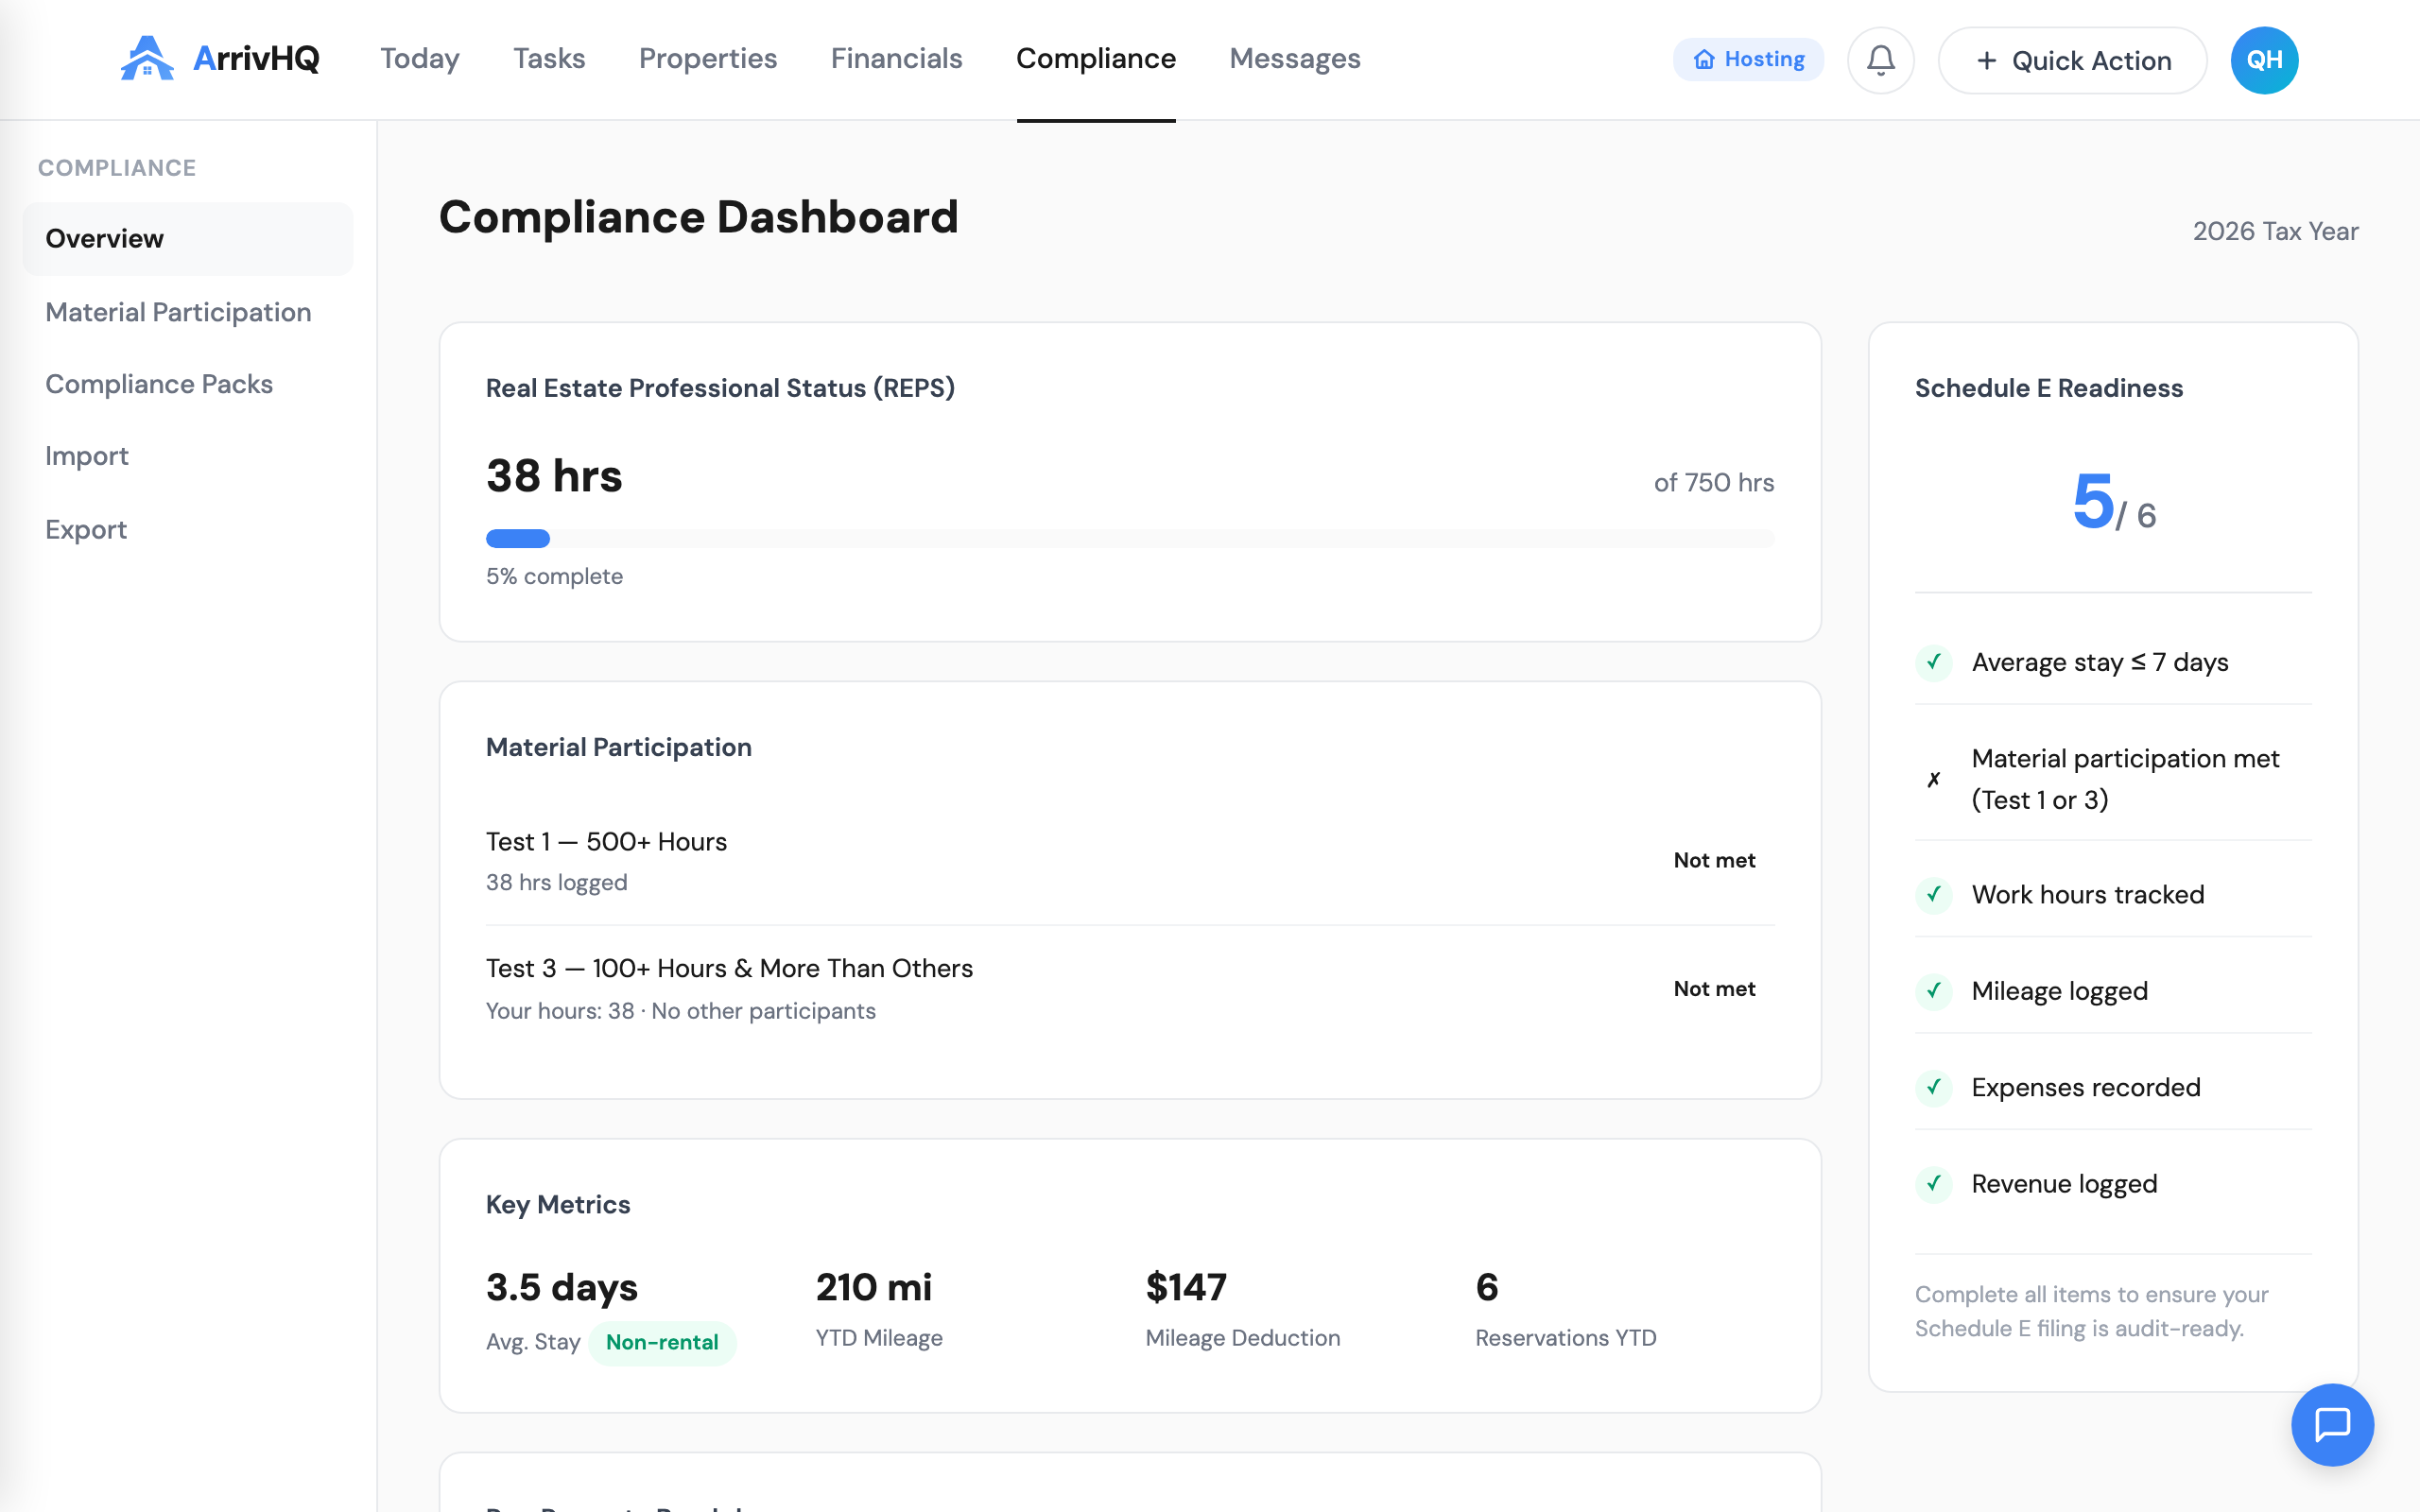
The compliance dashboard shows:
- REPS progress — how close you are to the 750-hour threshold
- Material participation status — whether you pass the 500-hour or 100-hour tests
- Schedule E readiness — a checklist of what the IRS expects to see
This is not a tax filing tool. It is a documentation organizer. You work with your tax professional using the records ArrivHQ helps you keep — and those records are dramatically better than a shoebox of receipts.
See the Compliance documentation for a deeper look.
What to do next
You now have the foundation in place. The property is set up, you know where to log expenses, work hours, and mileage, and you can see how it all flows into the compliance dashboard.
Here is where to go from here:
- Set up checklist templates — automate your turnover workflow so nothing gets missed between guests. Checklists documentation
- Invite your first guest — give them access to entry codes, property guides, and messaging through the guest portal. Guest documentation
- Set up digital waivers — collect legally binding signatures from every adult guest and parent/guardian signatures for minors. E-Signatures documentation
- Add team members — invite cleaners, co-hosts, or property managers with role-based access. Team documentation
- Log revenue — record payouts from Airbnb, VRBO, and direct bookings. Revenue documentation
Each of these topics gets its own deep-dive post in this series. For now, the most important thing is the habit: log your expenses and work hours as they happen, and let ArrivHQ handle the rest.